


It has been a while since I posted, so I though I would give an update.
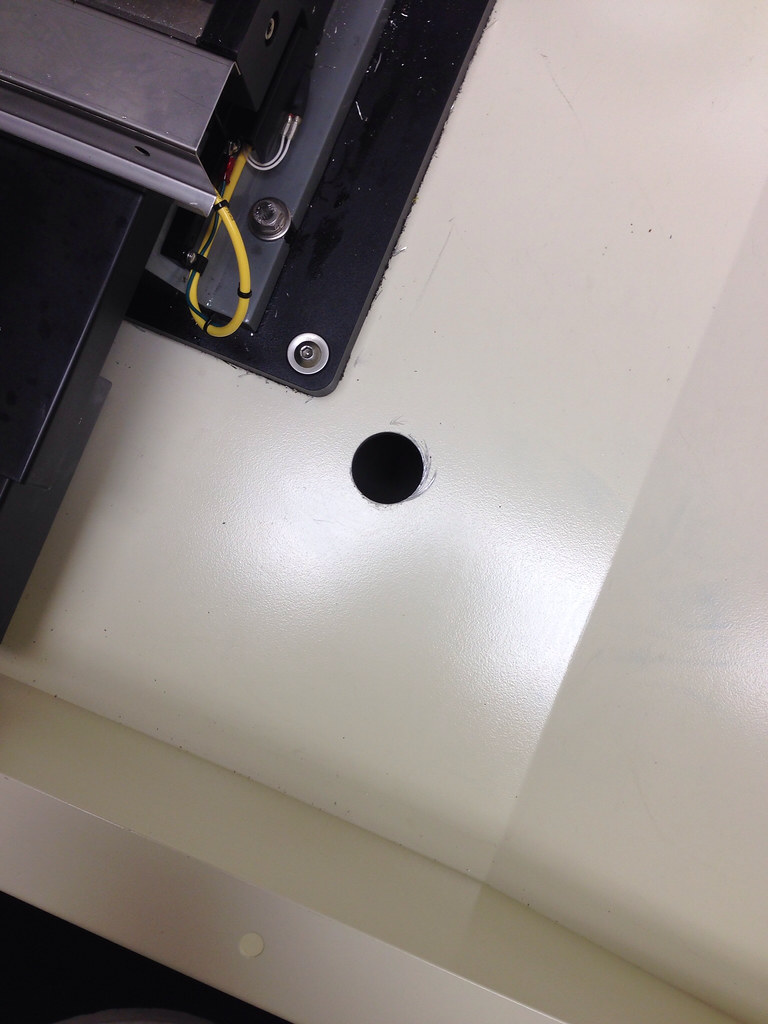
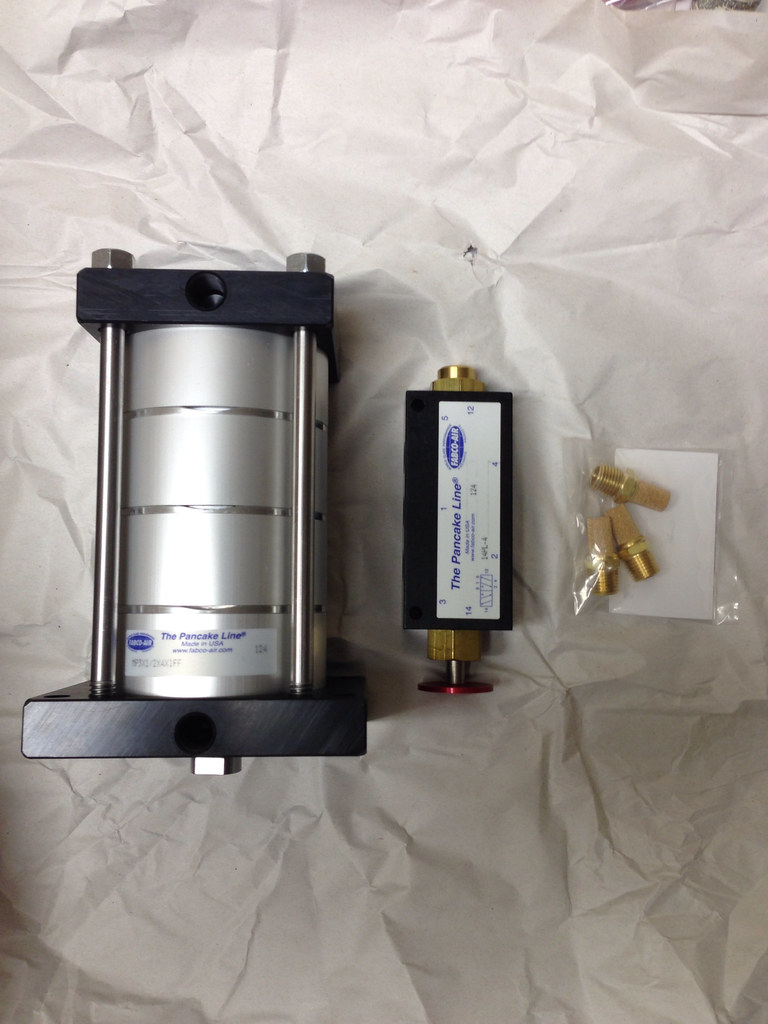
I got the mill running and made my first part, which was Hoss’ spindle vibration damper. It worked great for a bit, but I picked the wrong material (oil filed nylon), which did not hold up well. I need to make a new one. I am working on getting my coolant system setup, I got a compressor, and I also bought an air cylinder from Fabco, PN: MP3X1/2X4X1FF. I bought it brand new for $250.00 from Flow Dynamics & Automation. They gave me the best price I could find. The air cylinder fits on the head of the mill perfectly. It is a four stage cylinder with a 1/2 inch stroke. It generates 2690 lbs of force at 100 psi. I had already designed one, but this saved me a lot of time and probably some money. The last thing I did was open up the coolant drain hole in my stand to 1.75 inch. I am going to get a 1.5 inch drain and use that with a mesh filter for a sink.
Mill ready to go:
First attempt (computer went to sleep):
Second attempt:
Air cylinder and valve:
Air cylinder sitting on mill head for scale:
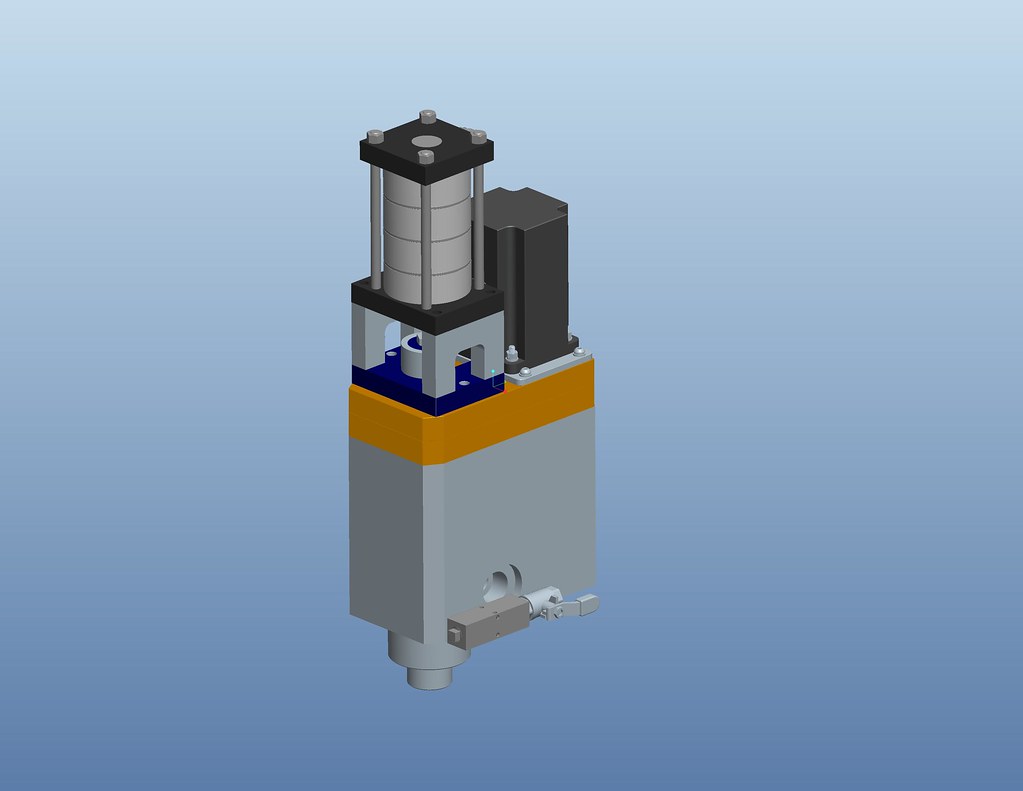
Pic of where I am heading with the design:
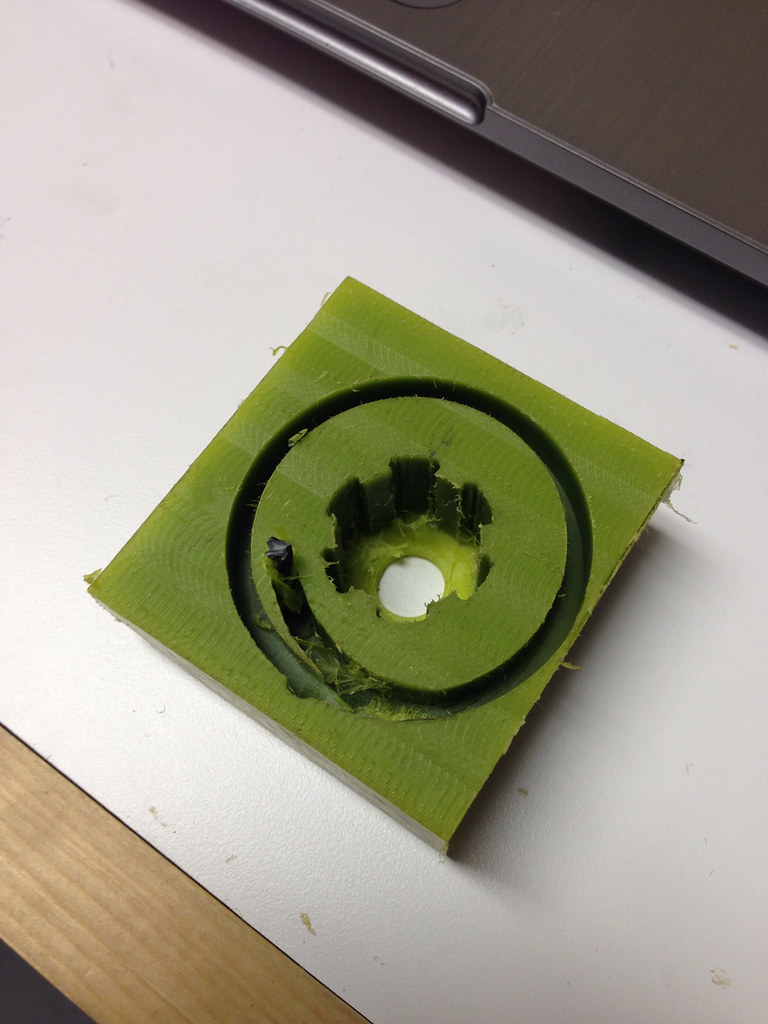
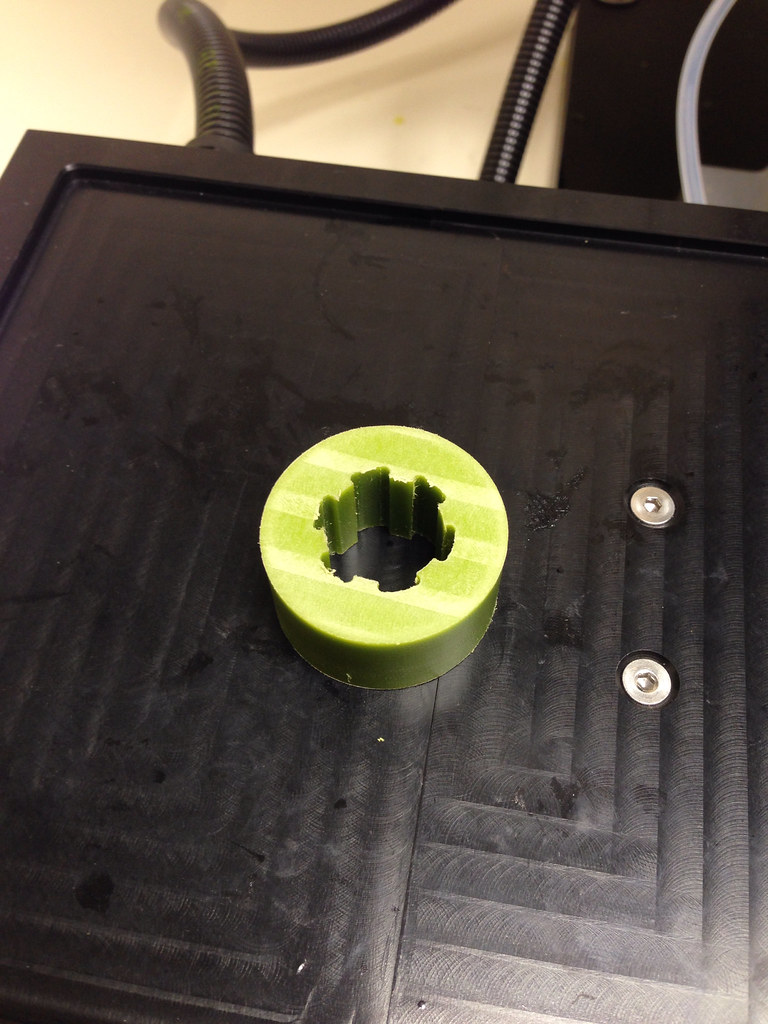
Hole saw guide:
Finished hole:
Thread: Graham's Optimum BF20 Build
Results 101 to 120 of 192
-
01-05-2015, 04:49 AM #101
 Registered
- Join Date
- Nov 2012
- Posts
- 220
Re: Graham's Optimum BF20 Build
-
01-05-2015, 11:54 PM #102
Registered

- Join Date
- Aug 2005
- Posts
- 1100
Re: Graham's Optimum BF20 Build
Regarding the hole-saw guide. I've just learnt something.
I always struggled to enlarge a hole like that.
Cheers,
Peter-------------------------------------------------
Homann Designs - http://www.homanndesigns.com/store
-
01-07-2015, 04:27 AM #103
Registered
- Join Date
- Nov 2012
- Posts
- 220
Me too Originally Posted by phomann

 . Took me a while to come up with it. A thicker piece of wood would have worked better. I had to stand on it to hold it in place.
-
02-23-2015, 04:03 AM #104
Registered
- Join Date
- Nov 2012
- Posts
- 220
Re: Graham's Optimum BF20 Build
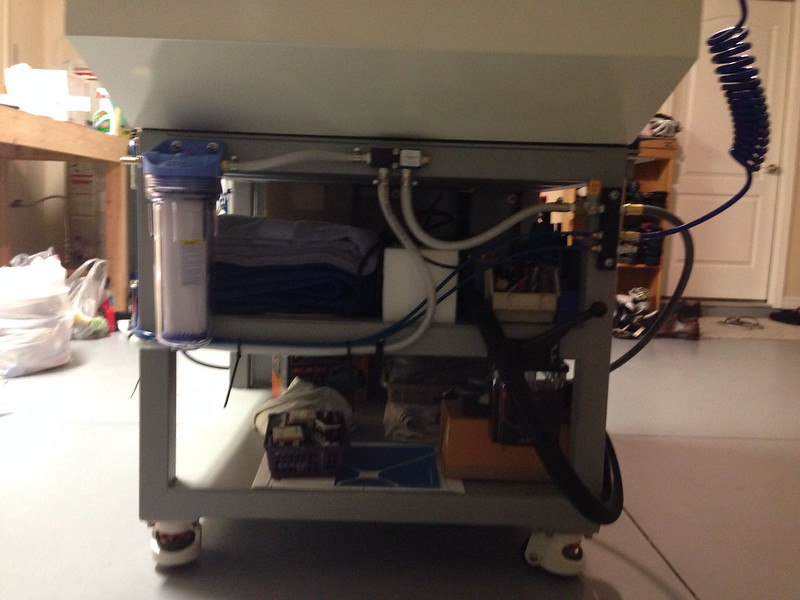
I thought I would give a small update. I have been working on plumbing the mill for flood coolant and air. I have set it up so I have a blowgun and a spray hose built into the mill. The spray hose works off of the flood coolant. I also installed a 50 micron water filter. I just need to machine a mounting plate for the flood coolant manifold so it can mount on the mill head and I will be good to go. I still need to re-run the oil lines and finish dressing everything in. I also had a tool holder made that mounts on the front of the mill--holds 12 tools. The other thing I have to do is drill the polycarbonate sheet and put on the handles. Here are some pics of everything almost finished.
Back of mill:

Side of mill:
Front of mill:

-
02-23-2015, 04:13 AM #105
- Join Date
- Nov 2009
- Posts
- 98
Re: Graham's Optimum BF20 Build
Top job there, looking really really neat & clean.
I just look at either my mill or bike and both of us are covered in oil & grease.Stoner #1
-
02-23-2015, 08:35 PM #106
Registered
- Join Date
- Oct 2010
- Posts
- 1189
Re: Graham's Optimum BF20 Build
Hi i really like your craftsmanship (not so much the BF20
 -
-
Question did you deign the splashguard / tray yourself was it a kit ? And are you happy with it
I designed similar for my mill but i like your design better
thx
thomas
-
02-24-2015, 06:58 AM #107
Registered
- Join Date
- Nov 2012
- Posts
- 220
Re: Graham's Optimum BF20 Build
Thanks bladehunter, I am trying to stay off of the wife's radar. I am sure as soon as I start running the flood coolant things will get messy Originally Posted by bladehunter
-
02-24-2015, 07:16 AM #108
Registered
- Join Date
- Nov 2012
- Posts
- 220
Re: Graham's Optimum BF20 Build
Tkamsker, I designed the stand/enclosure myself. When I designed it I had no experience with flood coolant or working with a machine that was inside an enclosure, so there are defiantly things I would change. The first thing I would change is the height of the chip tray. I would make it stop at the height of the mill table's surface. This would let me machine longer pieces if I had cutouts in the side panels. Next I would change how the coolant drains and how the mill mounts. I would have mounted the mill on square pucks welded to the box tubing. I would have welded flat plates to the underside of the box tubing to create two pockets on the left and right side of the mill that the chips and flood coolant would drain into with a min of 1.5 inch drain tubes in each one. I would have welded a flat plat directly underneath the mill on the topside of the box tubing, which would have encouraged everything to drain into the two side pockets (not sure if this makes sense). I may not have done the top shelf on the stand so I could fit coolant reservoir in the stand. I would have mounted the control cabinet on the back of the mill column or somewhere around there. That would have cut down on cabling and connectors; something more like what Dave Decaussin did on his UMC10--connectors add a lot of cost. Those are the first things that come to mind, but there will be more as I use the mill more. Originally Posted by Tkamsker
-
02-24-2015, 08:32 AM #109
Registered
- Join Date
- Oct 2010
- Posts
- 1189
Re: Graham's Optimum BF20 Build
My Design Looks like Attachment 270036 where you can See the Chip trap Under mill Attachment 270038 Front side view Shows that i left space for long pieces like Bridgeport does
Attachment 270040 backside has plenty of space for Electronic but at your Design i like the angles towards the machine stand did you cut the pieces and Weld it or bend all aß needed ?
-
02-24-2015, 02:35 PM #110
Registered
- Join Date
- Aug 2008
- Posts
- 1186
Re: Graham's Optimum BF20 Build
Doesn't look like you have much of drain angle on the pan there. May want to rethink that if your planning on running flood coolant.
If I were to do mine again, I would have a front to back up-slope (front being the low side) with a 6" (front to back width) trough channel at the front edge. The trough bottom would be angled down to both the left and right (peak in the center). I would have large 12" x 6" drain openings on each side of the base into removable chip catch boxes with screen bottoms that drain into a coolant return tank through filters and return tubes. Would make clean up very simple and naturally give chips a easy way out of the enclosure.
And as mentioned, make the front lip just a 1/16" lower than the table surface height so a large vice can hang over With the doors open. You could make it deep enough to fully enclose the vice, but it would be very deep. I have a single vertical door that I like because I can close it down to the vice height and it stops 95% of any splash if I need the vice mounted front to back. Most of the time I bolt it side to side so it's a non issue.
Nice build to the OP, very nice setup and workmanship!
Chris
-
02-24-2015, 03:18 PM #111
Gold Member
- Join Date
- Nov 2009
- Posts
- 4415
Re: Graham's Optimum BF20 Build
GC Very nice build.
I built ( had a sheet metal shop) an enclosure for my DM2400 years ago. If I were to do it again it would be with the drawer or chip box as prefiltration, not a tubular drain. In fact if the mill was mounted on rectangular tubing suspended over a large opening would be best IMO.A lazy man does it twice.
-
02-24-2015, 09:56 PM #112
Registered
- Join Date
- Oct 2010
- Posts
- 1189
Re: Graham's Optimum BF20 Build
Yes it Drainage angle question which angle would you See aß Minimum ... ?
-
03-07-2015, 10:46 PM #113
Registered
- Join Date
- Nov 2012
- Posts
- 220
Re: Graham's Optimum BF20 Build
I made the angle on my enclosure base as steep as possible, with out hitting the underside of the table. The reality is you need an angle greater than zero, so you can direct the coolant to the drain. The steeper the angle the faster the coolant will move to the drain. If this is your first build, take this as a lesson learned and apply it to your next build. Originally Posted by Tkamsker
@ Fastest1, lcvette, and bladehunter, thanks for the compliment on the build and solid advice for stand/enclosure design.
Here is a picture with almost everything done. I am working on making the parts for mounting the power draw bar and the new motor. It is slow going, I keep making dumb mistakes like remembering to adjust tool height for a new tool and one time I forgot to turn on the spindle...like I said dumb.
One weird thing I have noticed, which I am trying to figure out, is why the mill thinks the stock is in the wrong place when it starts adaptive clearing/contouring. It will drill the holes in the right place, but when it transitions to adaptive clearing it is off by about 0.50 inches. I am about to go run some test cuts and see if I separating hole drilling from contouring in separate programs will fix the issue. I am using HSMXpress with Solidworks.
Here is the pic with the enclosure finished:

-
03-07-2015, 10:52 PM #114
Registered
- Join Date
- Aug 2008
- Posts
- 1186
Re: Graham's Optimum BF20 Build
Maybe something with your post processor? Absolute incremental settings perhaps. Drooling is almost always done with absolute and contouring and clearing is usually incremental.
-
03-08-2015, 12:14 AM #115
Registered
- Join Date
- Nov 2012
- Posts
- 220
Re: Graham's Optimum BF20 Build
Thanks for the feedback Icvette:cheers: It turns out it was operator error again. I was zeroing on the work piece before I loaded the code. I am sure this is obvious to most of you guys, but seems like the correct sequence is load the code, then home the mill, then zero off of the work piece, and finally regenerate the tool paths...sooner or later I will get my head out of my ass Originally Posted by lcvette

Does anyone have a recommendation for speeds and feeds for countersinking holes? I am using a 5/8 3 flute countersink (McMaster pn: 2742A514) and it is leaving a rough finish. I am plunging at 10 ipm at 3500 rpm and the finish looks like crap.
-
03-08-2015, 12:19 AM #116
Registered
- Join Date
- Nov 2012
- Posts
- 220
Re: Graham's Optimum BF20 Build
By the way, I just started using a ShuttleXpress and it is awesome! Downloaded the plugin off of the Mach site, set the buttons, and it was good to go. Makes everything so much faster. It is the same controller that Tormach uses.
-
03-08-2015, 12:29 AM #117
Registered
- Join Date
- Aug 2008
- Posts
- 1186
Re: Graham's Optimum BF20 Build
That's a bit aggressive plunge for a small mill and a 5/8" anything, try allowing it down a bit.. Start at 2ipm and go up from there.
-
03-08-2015, 12:34 AM #118
Member
- Join Date
- Apr 2006
- Posts
- 8159
Re: Graham's Optimum BF20 Build
With a countersink you want as low rpm as you can manage and a decent plunge rate. 10ipm should be good but way too high rpm.
With high rpm you could use it like chamfering tool and contour the chamfer.
Still won't give you as nice a finish as using it properly with very low rpm and a straight plunge.
Hosshttp://www.hossmachine.info - Gosh, you've... really got some nice toys here. - Roy Batty -- http://www.g0704.com - http://www.bf20.com - http://www.g0602.com
-
03-08-2015, 06:39 AM #119
Registered
- Join Date
- Nov 2012
- Posts
- 220
Re: Graham's Optimum BF20 Build
Thanks Hoss Originally Posted by hoss2006
Would it help to dwell at the bottom of the cut for a second before retracting?
-
03-08-2015, 09:05 AM #120
Member
- Join Date
- Apr 2006
- Posts
- 8159
Re: Graham's Optimum BF20 Build
If it were a single flute csink maybe a half second dwell but for yours no, should be enough inherent dwell to be fine even under 200 rpm.
Hosshttp://www.hossmachine.info - Gosh, you've... really got some nice toys here. - Roy Batty -- http://www.g0704.com - http://www.bf20.com - http://www.g0602.com


 Reply With Quote
Similar Threads
-
my converted optimum bf20 cnc for sale
By 3barboost in forum South Africa Club HouseReplies: 0Last Post: 03-07-2014, 08:39 PM -
Yet another BF20 build by a noob
By crclark in forum Benchtop MachinesReplies: 21Last Post: 02-27-2012, 09:40 PM -
Optimum BF20 G0704 Conversion
By Winnfield in forum Benchtop MachinesReplies: 0Last Post: 08-07-2011, 12:16 AM -
Sieg KX3 or Optimum BF20? Need advice, please.
By anlmat in forum Uncategorised MetalWorking MachinesReplies: 2Last Post: 01-30-2011, 10:21 AM -
BF20 BALLSCREW OPTIMUM
By dfv in forum Uncategorised MetalWorking MachinesReplies: 0Last Post: 04-16-2010, 07:26 PM
