


Well hello...It finally nearly got me...nearly.
Today after 4months I discovered some stuff. My name is Brian by the way, Ive been a lurker on here for years so lets nobody panic now that Im out of the darkness!
Today, I loaded on Mach3.
A little bit of history. 4months ago I bought a Hurco Km3 that was faulty on the z.
I didnt even bother try fix it.
I ripped it all out and fitted a pmdx 126, 3 geckos(320x) the pc, and the twin P.port cards. All the parts I got of Steve, and boys, what_a great guy he is.
I got encoders off digikey, the amt102s.
Ill have a lot of questions here, so hopefully people will look, but, I have a major one first.
This morning, my horror was realised when I discovered my y motor is/was burnt to a crisp inside.
I almost went insane trying to tune it with the 126 onboard test function before that. It would not tune nice, and I had checked everything.
So..I carried on, hoping that Mach3 would drive it better.
It did not.
I had the machine all wired nice and good to go, so I had to undo a bit of that and bit the bullet and swapped the servo off the z, down onto the y.
What a difference that made. It was perfect.
I opened up the dud servo and Its windings are all shot. And for a long time too, I just noticed now.
So, the question is, where do I go from here. I think I should get a nema, and slap that on the z. I would then need a driver for it, since my own are 320xs.
Should I do this?
Will a stepper run off my power rail to 320xs and power a 203v?
Is it going to be a nightmare calibrate both the x/y servos, and a stepper on the z(quill)?
Servos seem to be insane money, and rare.
Im a mech designer and have all the other stuff needed to graft on a nema something to where the servo came off.
Is this the way to go folks?
I know the deal with steppers, lost steps etc, what do you think?
What size would I need for z, and is it a good Idea to mix and match steppers and servos in mach3, and both on the job.
Many thanks, and I intend having loads more questions along the way, but this Is my first on I couldn't find an answer for.
Other that that all the rest runs sweet as.
Is it worth getting a servo rewound? Its Like it went on fire inside...
Regards,
Brian,
Results 1 to 11 of 11
-
02-13-2012, 12:49 AM #1
 Registered
- Join Date
- Aug 2011
- Posts
- 0
My Hurco km3 retrofit/sanity check
-
05-10-2012, 03:36 AM #2
Registered
- Join Date
- Sep 2006
- Posts
- 300
Hello Brian,
I have a similar retrofit. You would do better to keep all servos ( I think from past discussions, servos & steppers won't play together ).
).
There are some Hurco servos listed on E-bay all the time for around $300 USD. There may be some in your country on E-bay.
Let us know what you do.
Welcome to CNCzone.
JAckal:cheers:Everything is bio-degradable, if you run over it enough times with the lawnmower.
-
01-06-2013, 06:38 PM #3
Registered
- Join Date
- Aug 2011
- Posts
- 0
Just to update this, nearly a yr later of everyday running in Al, Ti, and En24 the mill has been flawless. If anyone has any questions on a Km3 retrofit let me know. Ive been through every square mm of it!
Brian,
-
03-18-2013, 01:15 PM #4
Registered
- Join Date
- Nov 2005
- Posts
- 19
Great to hear it's been reliable. I just brought a KM3P home this weekend. I'm getting ready to do the same except I have some older Granite Devices cards I never used. I'll holler if I run into any shoe stoppers.
Scott
-
03-20-2013, 03:29 AM #5
Registered
- Join Date
- Aug 2011
- Posts
- 0
Yup, be sure and shout if you need anything!
Brian,
-
03-20-2013, 08:29 PM #6
Registered
- Join Date
- Nov 2005
- Posts
- 19
Thanks! I'm sure there will be questions.
Have any pics of your control cabinet after the retrofit?
I pulled almost all of the old hardware out leaving as much of the wiring in terminal blocks as possible with the hopes of still being able to partially use the schematics I have for it.
Did you have to change encoders, or just opt to? Mine look like pretty good ones (BEI E25').
-
03-20-2013, 08:49 PM #7
Registered
- Join Date
- Aug 2011
- Posts
- 0
I used the amt encoders from digikey. One of my glass encoders was broken, and another had a ton of bare wires so I binned them all. The amts fit neat on there but you do have to make a stepped washer fitted from rear in order to have someplace to screw them onto. (you will understand this when you remove glass encoders.)
http://www.digikey.com/us/en/ph/cui/amt.html
Here is a rundown,
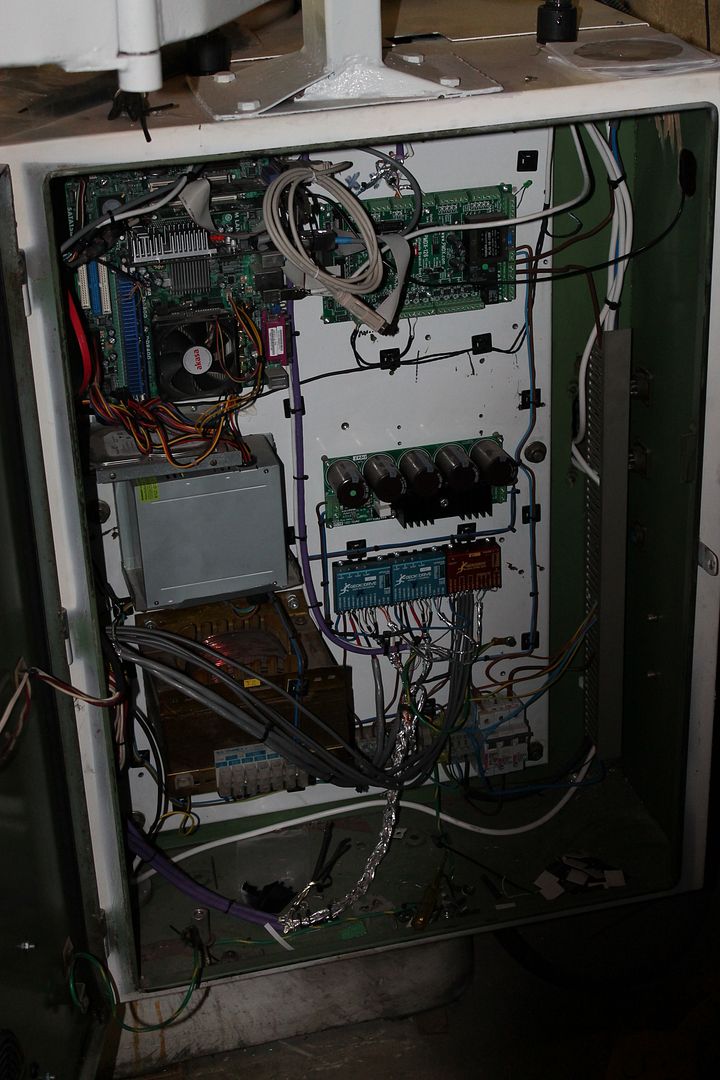
I then gutted the machine of all its electrics as they were added to in spots.
Since the machine is at the bk of my house, I wanted peace of mind in that area.
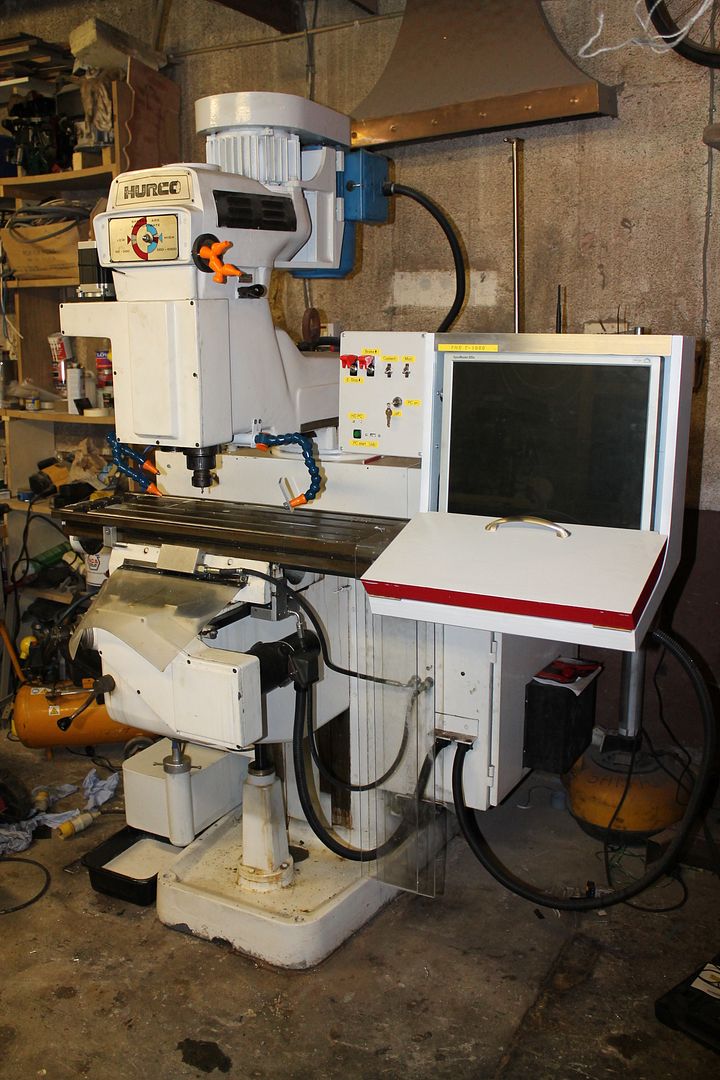
I retrofitted the entire machine with new parts. I used,
an average new pc/board, incl powersupply.
A pmdx 126 breakout board.
Gecko drivers.
Digikey amt 102 encoders for the x and y original servos.
A nema 34 high torque stepper in place of the z(quill servo) The quill servo although fine, was hard to tune, and get settled at idle. On stripping it down, I found one coil burnt.
I looked at servos and they are insane dear new. So, I bought the stepper. I know they are slower for peck drilling and such, but its fine after testing it a fair bit the weekend.
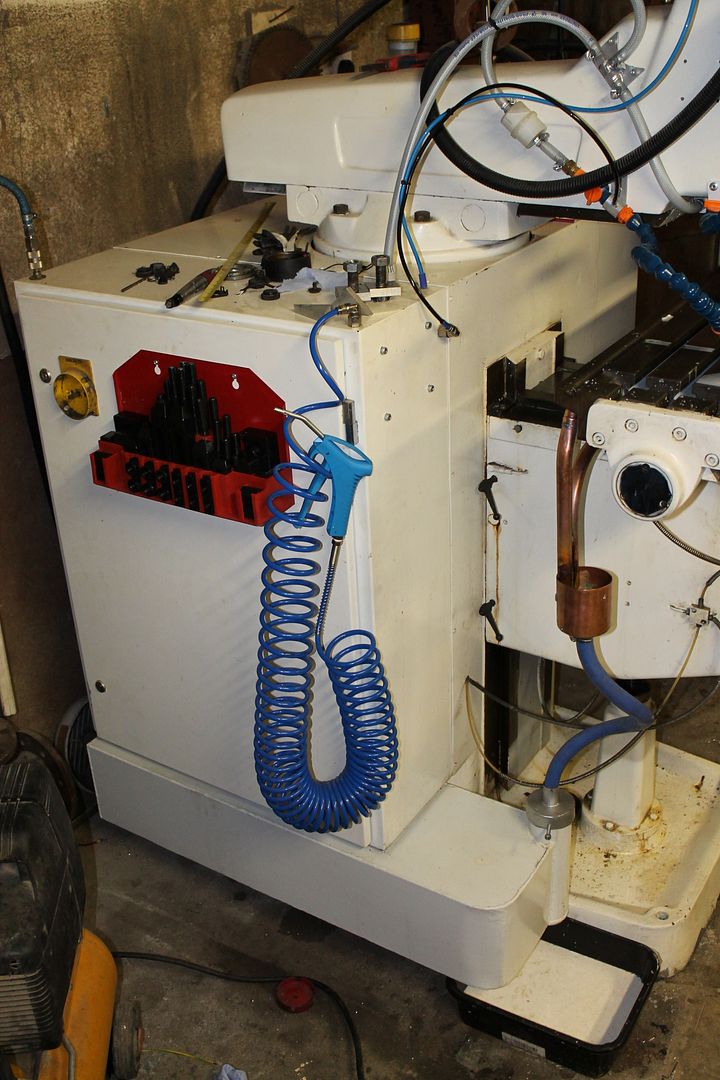
I removed the original boom arm and made a new one. This houses the glass covered screen, flipout dust proof lid, and the keyboard. The new console was born...
I used the old transformers to drive servos. The gecko motor drivers called for a little lower voltage, so I removed 4 windings to bring the secondary voltage to where I needed it.
That feeds a power prep module(converts to dc and some other stuff) that then feeds the drivers.
The whole thing runs off twin parallel ports.
It was a pretty big job, I had to relearn all the stuff I once sort of knew!
The machine runs mach3 which I find great.
Im running cambam as the drawing tool for the time being as its fine for what I need to do over the next while.
I changed the coolant tank, from the base, to a new tank I made under the left cabinet.
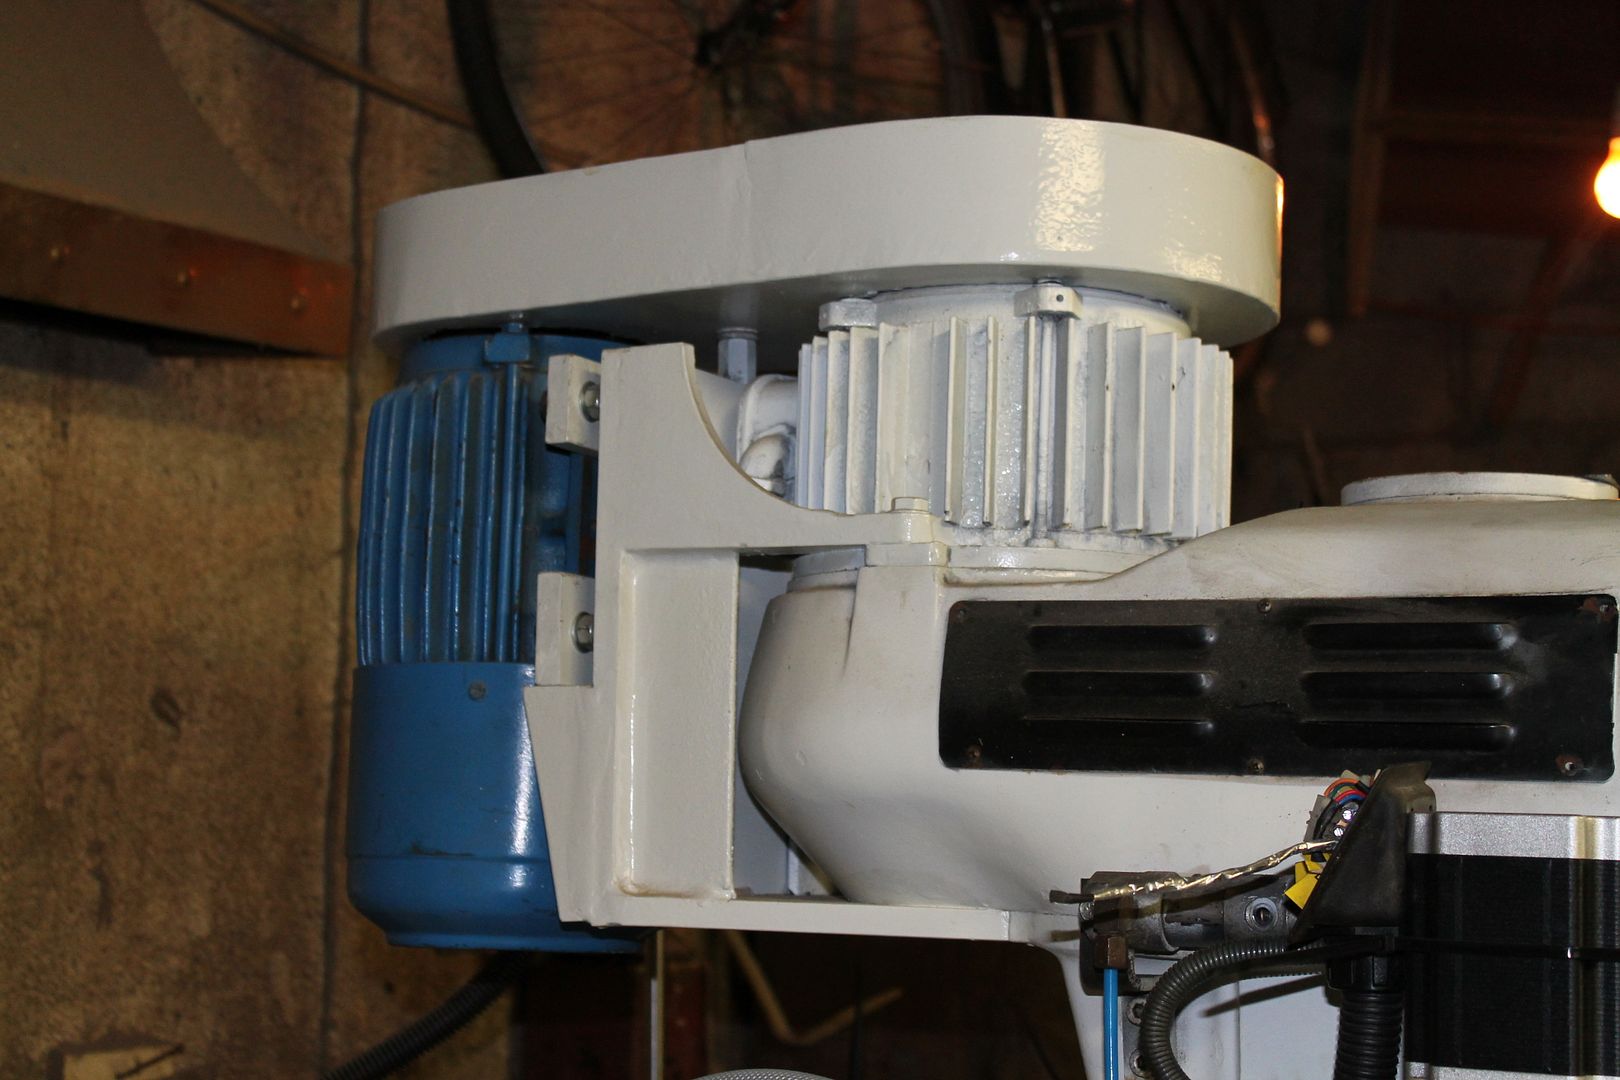
I also fitted a single phase spindle motor to the machine. This took an hr of thinking, as the 3phase is pretty integrated as you can see. I removed cooling fan from 3phase motor and put a pulley on there. A few bits of metal, and some paint and I had a running single phase spindle.
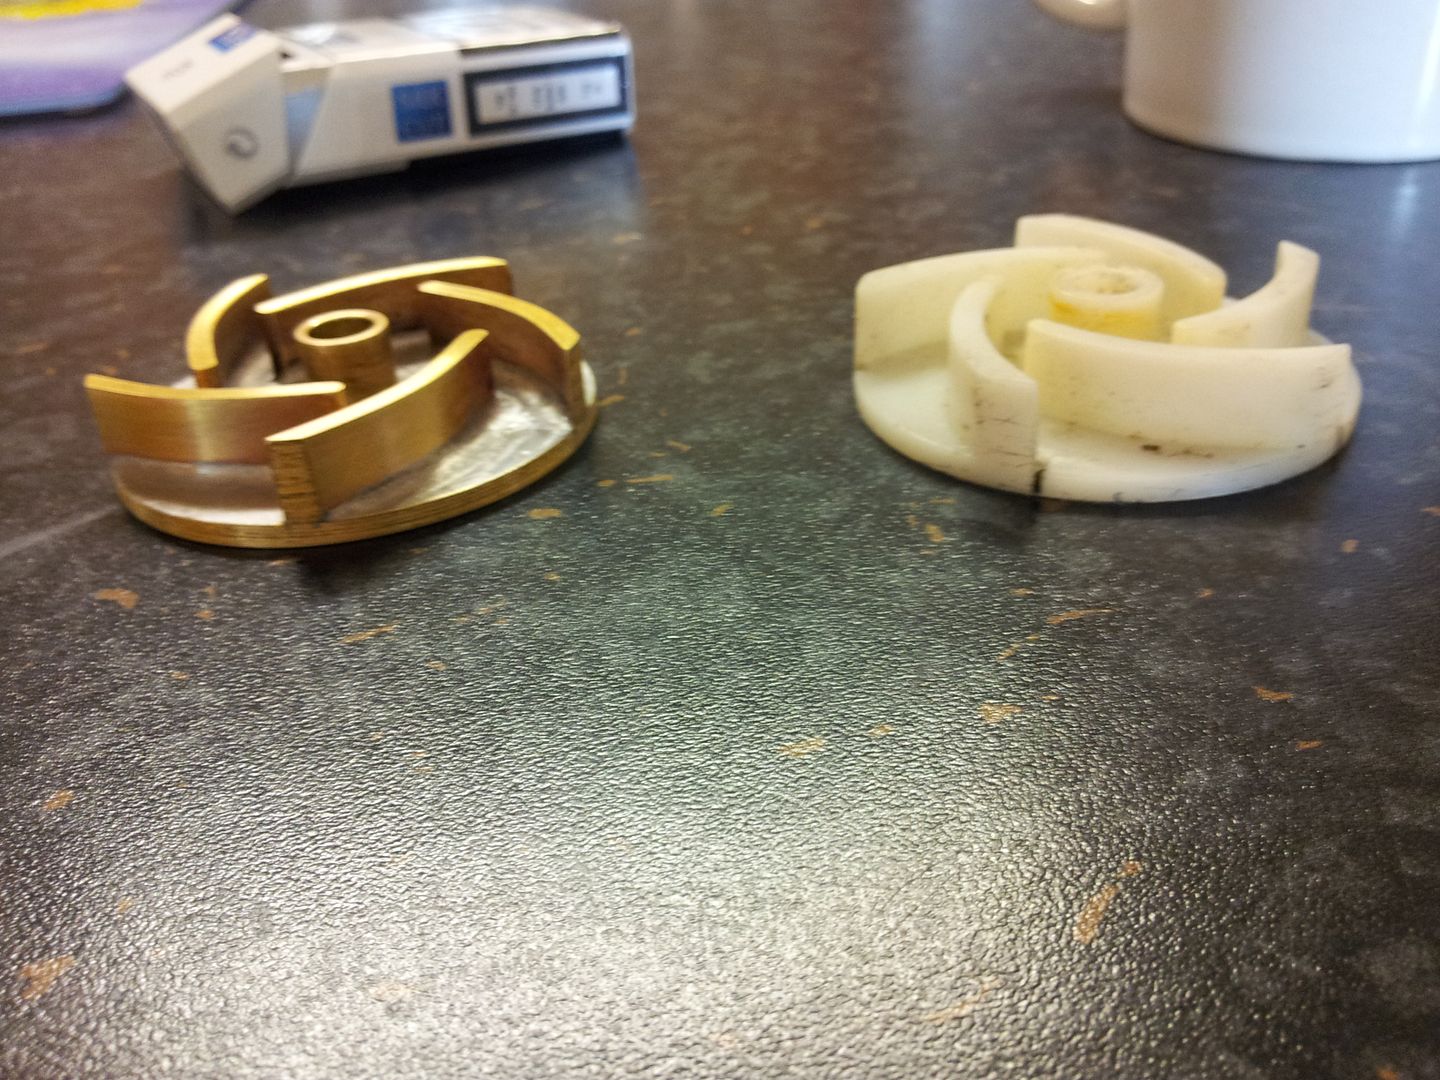
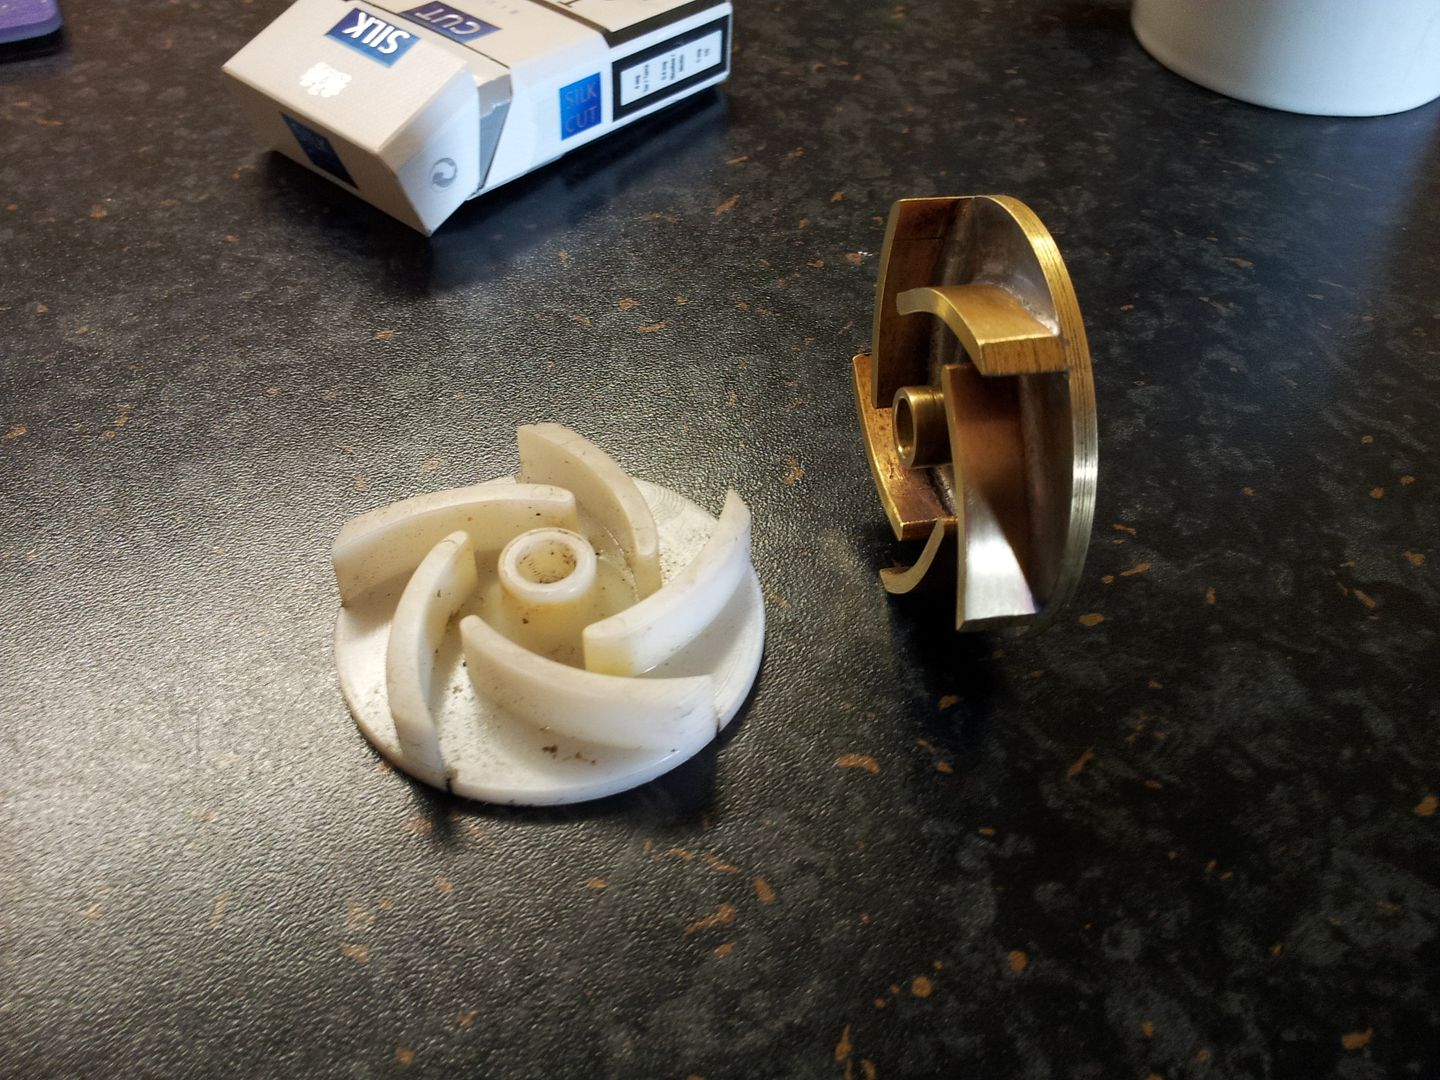
I also had to refit the coolant pump and all lines as it was 3 phase also. The single phase coolant pump motor I got could not be reversed so I had to remake another Impeller for pump from some brass. This was made by hand for fun, and took some time, and some solder...but it works great.
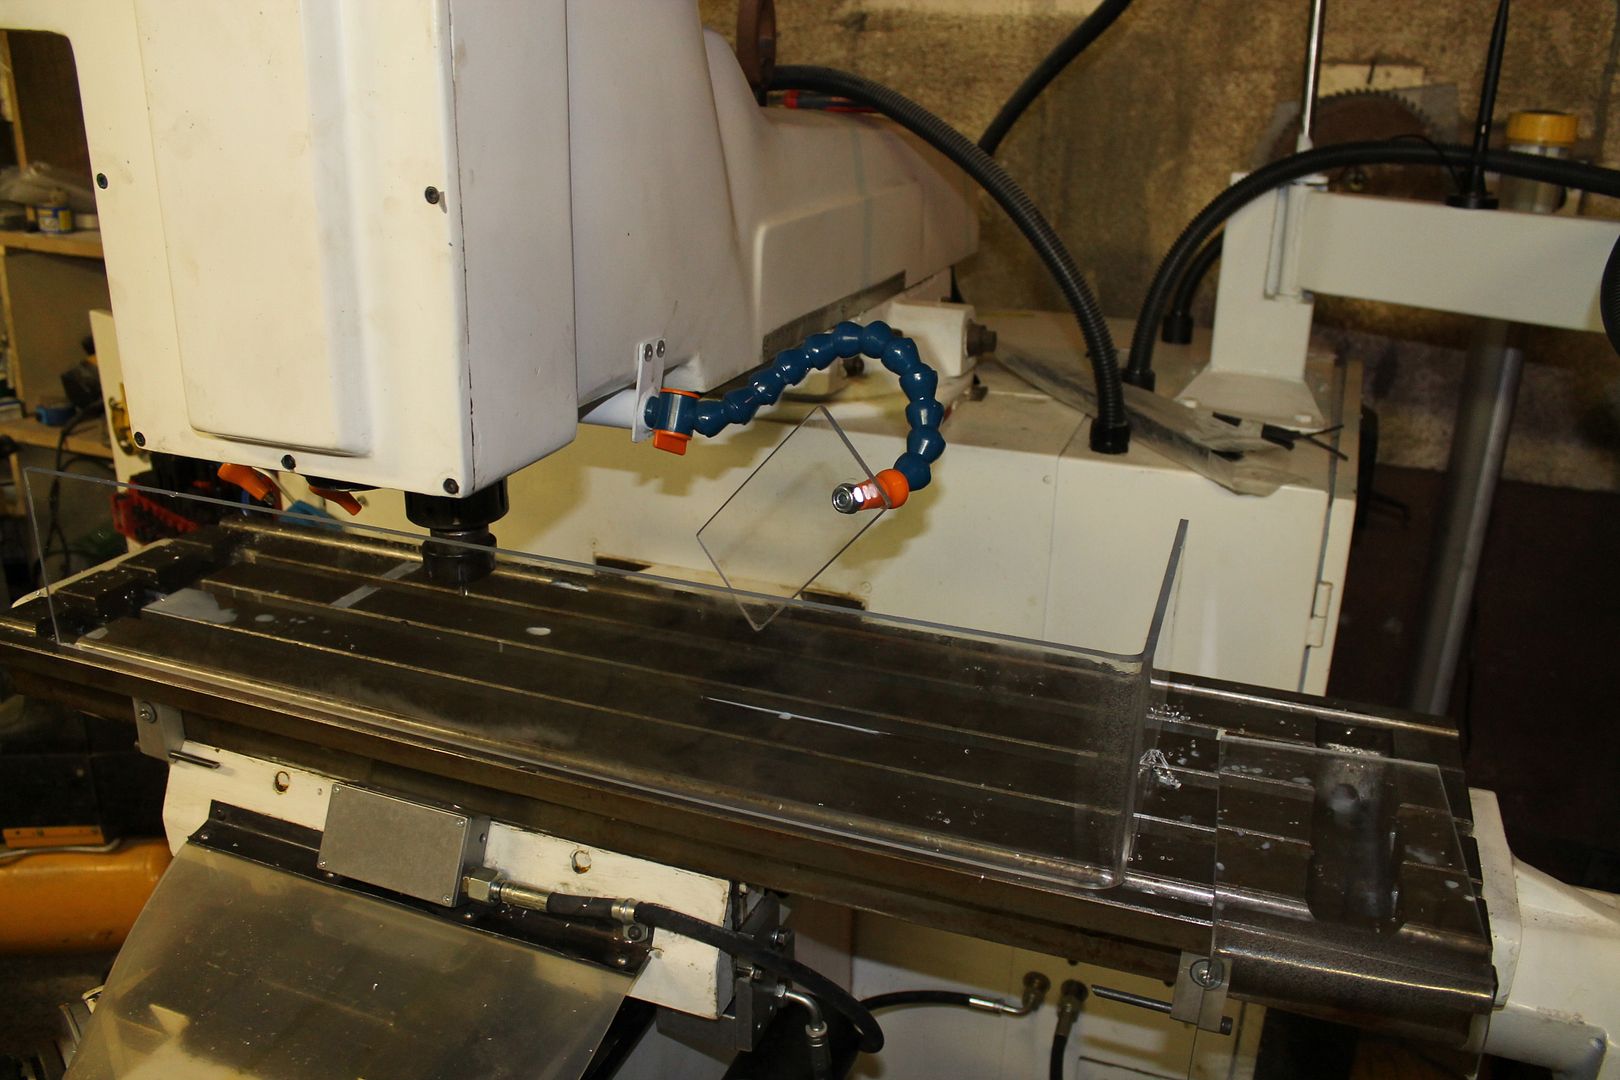
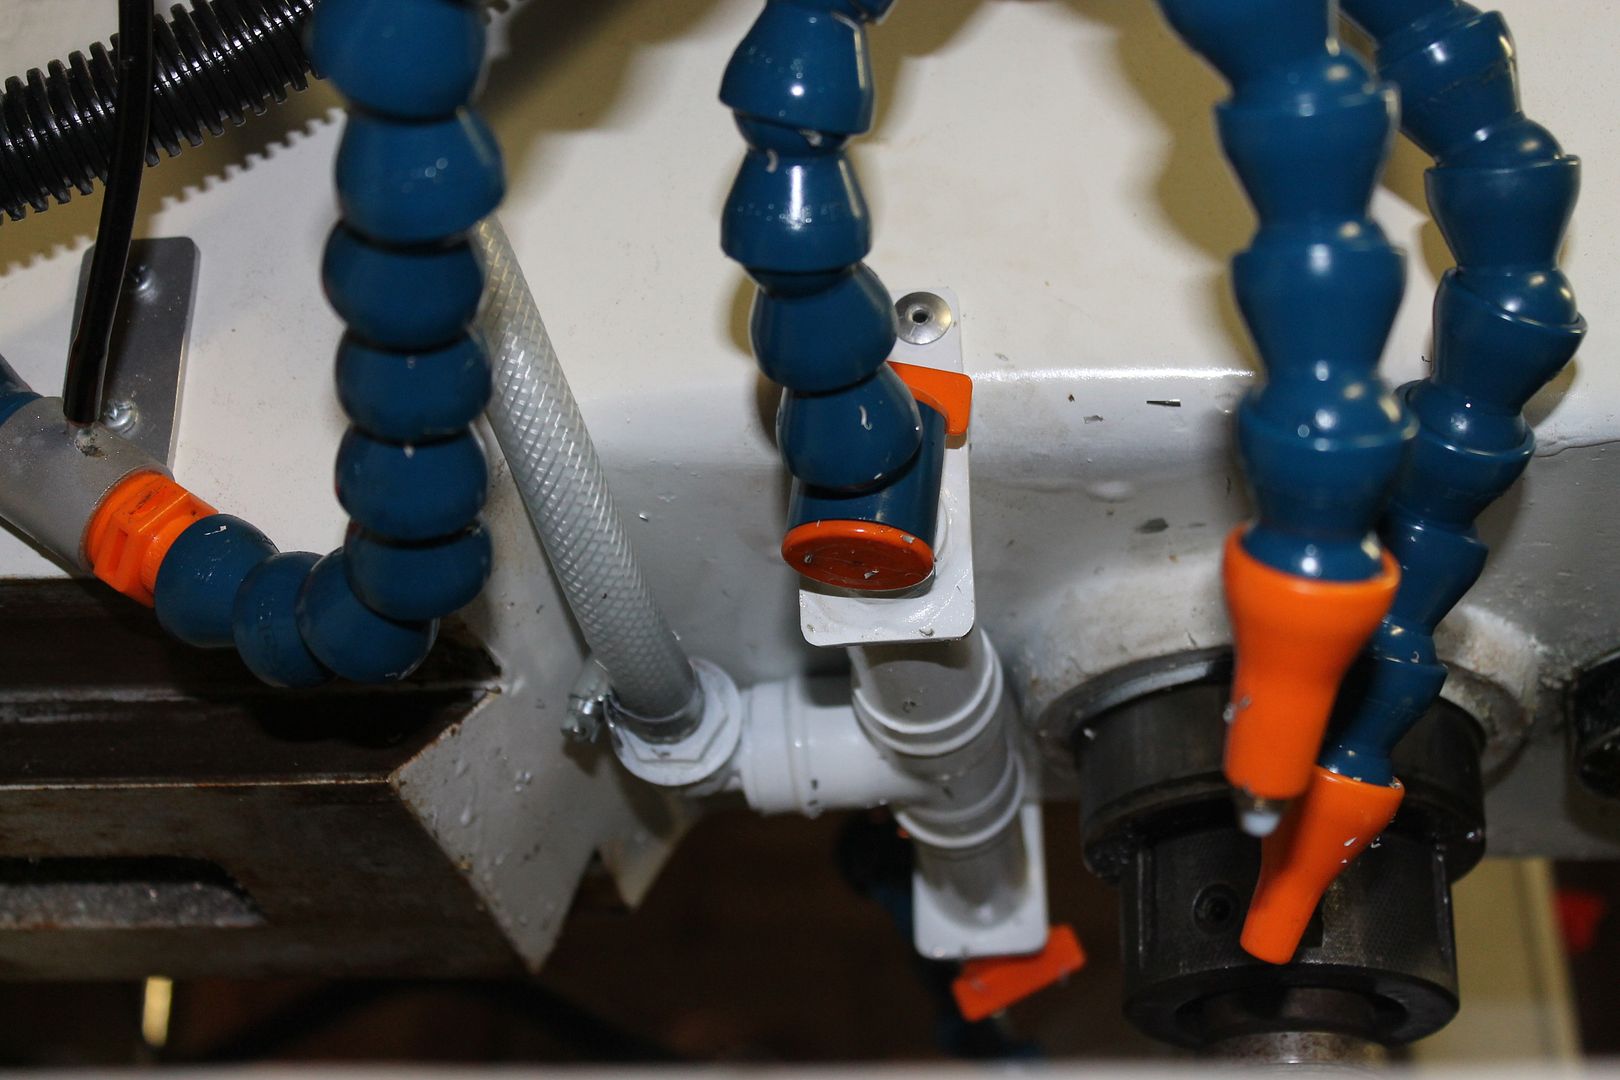
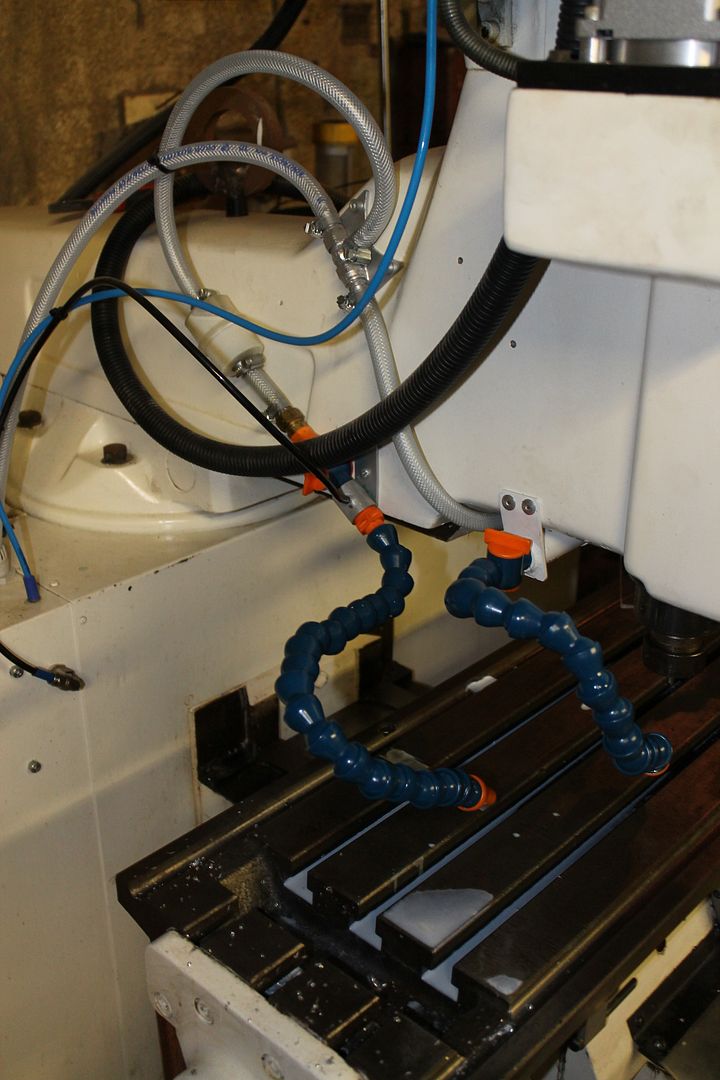
Since I was also redoing the pneumatics of the machine(needed for brake) I built a mister nozzle too.
I kept some manual controls on the new console, some like this, others dont. It saves writing it into programme for coolant control, plus, I like buttons...
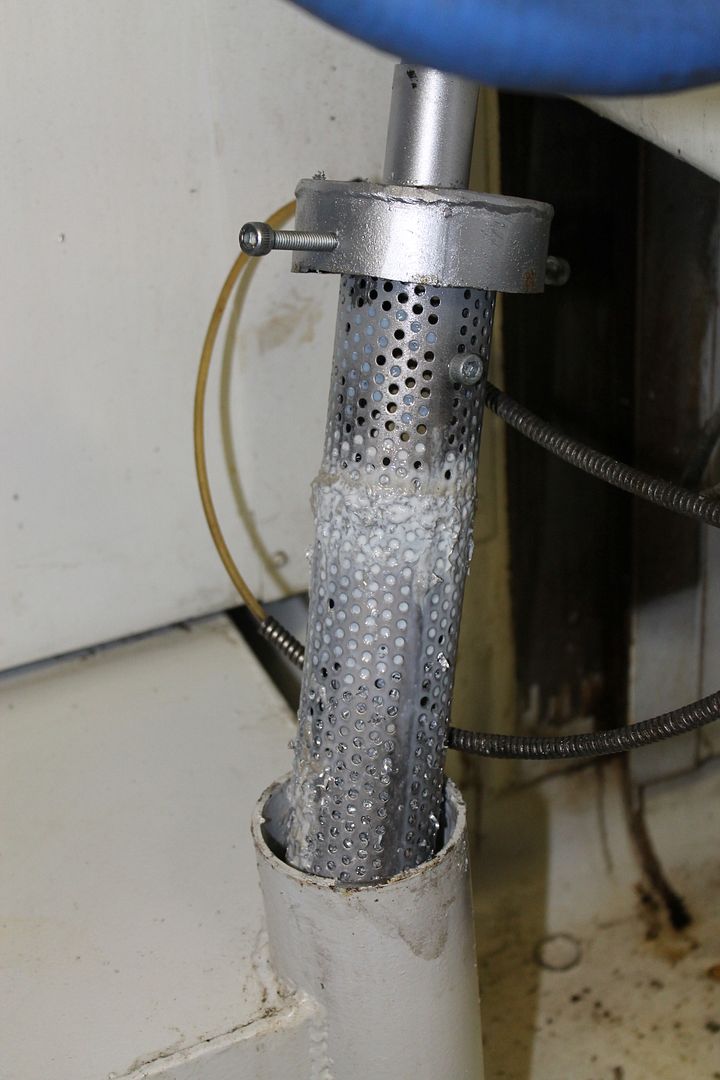
There is a small catch can at the end of the bed pipes to give you a chance to fish out small parts, or nuts should they get washed off the table. It works, and saves you fishing in main tank. There is also a swarf filter in the corner of the tank where the coolant drains in. The filter section unbolts from the cap.
I redid the drains on bed too.
Having run a few parts, I can say they work as I want. The perspex shields keep it all under control. All my work is small anyway. For bigger stuff, I can deal with a few splashes.
I made a small shield for one of the coolant nozzles too. The shield is through hole, keeping the nozzle functional when fitted.
I did some trial cuts to set up the machine and confirm accuracy.
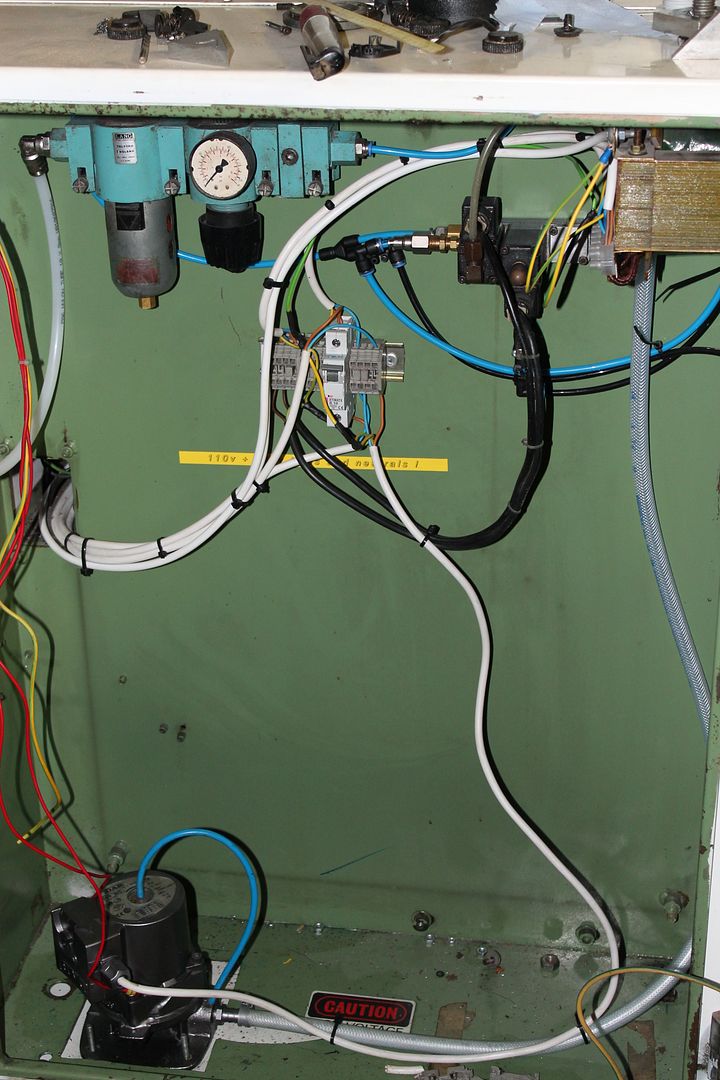


I have yet to tidy wiring a little, add some ferrites and add a faraday cage around transformer. The 'important' wiring is high grade double shielded twisted pair robotics grade wire which cost a fortune. But, worth it, as Im seeing no noise at all on the encoder lines.
The motor adapter frame I had to make,
The new impeller, 5 hrs work in that! If I was to cast it there would be just as much work in the pattern, so I said I go right to brass,
Brian,
-
03-20-2013, 08:50 PM #8
Registered
- Join Date
- Aug 2011
- Posts
- 0
double post
-
03-21-2013, 12:34 AM #9
Registered
- Join Date
- Nov 2005
- Posts
- 19
Wow! Sounds like I have quite a road ahead of me. Thanks for the info. I'm sure I'll be bugging you some more. Looks like there's been quite a few of these done...
-
03-21-2013, 06:54 AM #10
Registered
- Join Date
- Nov 2005
- Posts
- 19
Ok, I just got a chance to look at your reply on my PC (with pictures - didn't get them on my phone for some reason). Very nice work! I am still trying to cling to some of the original wiring in mine, but gutting it and doing my own is still a consideration...
-
03-21-2013, 03:50 PM #11
Registered
- Join Date
- Aug 2011
- Posts
- 0
It can be hard keep original wiring depending on what route you take. I was going to try and do same, but I couldnt help but join wires then. It gets a little bitty and I felt the less joins the better, so I started a fresh. The new console was a big deciding point too, as the wires to original console wre gone a little hard and one was broken internally where they exit the main chassis. At least when you fit all new wires, you wont have to doubt any of those - You will have enough for thinking about! Originally Posted by CreativeOffroad

I would actually try enjoy the conversion, if you rush it, and say ''well I'll fix up that right again when I get machine working'' 9/10 this never happens and it stays in pieced together form. Do it once, do it right!
Steve @ PMDX was excellent too I must say, his products are ace, and hes a really lovely guy. I must have sent him 6 emails, and he always answered quickly.
Brian,

 Reply With Quote
Similar Threads
-
Sanity check design please...
By Rarius in forum DIY CNC Router Table MachinesReplies: 20Last Post: 03-12-2009, 01:50 PM -
Chinese laser sanity check
By SimonArthur in forum Laser Engraving / Cutting Machine General TopicsReplies: 20Last Post: 12-15-2008, 04:11 PM -
Newbie sanity check
By mmm in forum DIY CNC Router Table MachinesReplies: 10Last Post: 11-10-2008, 05:34 PM -
Sanity check- 6'x10' table
By Zephrant in forum DNC Problems and SolutionsReplies: 17Last Post: 05-13-2003, 05:09 PM
