


Hi Guys. Thank you all for many posts recently.
And MrBean_pm, your name always make me think about the Mr. Bean in England...I love all of his movies..LOL. No problem, I'd always be happy to help.
I have finished the electric PDB setup and tests. I have proved it works now. Here are my test progress reports:
1. I retrofitted the electric actuator to final 145mm length and 8mm traveling as I said in last post. I think it's a good size for PDB. It contains limit switches inside so have no worry about its motor burning or other problems.
2. I designed the bracket to link the electric PDB to the ISO20 spindle unit. The basic structure is pretty much as Ian imagined.. We made a cartridge with 80mm inner diameter and cut a slot on side to permit the belt get through. A iron board was laser cut to fit the cartridge in and has the same dimensions of air cylinders so we can use both electric PDB or air cylinder one. The two parts were welded together and linked to the ISO20 spindle unit with three lock screw pins around.
3. Then I installed the electric PDB on the top of the bracket for some initial tests. I driven it with a 12V 30W transformer with rectifier. The PBD could act but the output force is not as big as thought. I measured the power voltage and found it dropped from 12V to 6.8V when the PDB pushing the spindle drawbar.. Clearly the 30W power is not enough. I turned to a larger power to make sure the voltage near to 12V when the PDB pushing the drawbar. Then it worked and for the first time I be able to insert an ISO20-ER20 tool holder into the spindle..
4. Firstly I only used three bolts because the PDB motor took the 4th blot position. The PDB was a little lean when pushing so I changed the PDB mounting angle and got the 4th bolt installed. Then It's much better.. I run it many times and confirmed the electric PDB works well with the ISO20 spindleThe only thing next is to test it many times to see if it works reliable. It takes about 4 seconds per time to release the tool holder.
So for now, the electric PDB development is done successfully. For formal ones I plan to ask the PDB supplier make the motor more power and make a shell for it to look nice.. And a formal control box containing power unit with a control switch, safe device will be come together.
Thanks.
Defeng
Results 1,801 to 1,820 of 3662
-
05-13-2015, 08:52 PM #1801
 Registered

- Join Date
- Jul 2011
- Posts
- 441
Re: Show how to build a CNC machine from the very beginning to the end
www.skyfirecnc.com
Email: [email protected]; Skype: skyfirecnc
-
05-13-2015, 09:07 PM #1802
Registered
- Join Date
- Jul 2011
- Posts
- 441
Re: Show how to build a CNC machine from the very beginning to the end
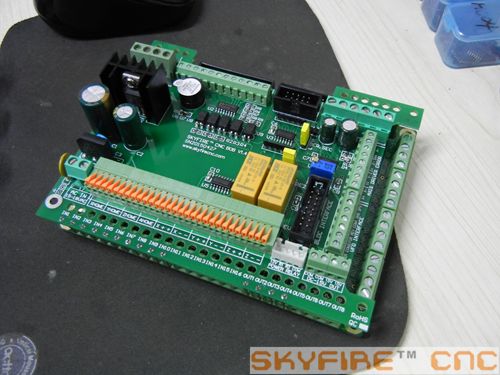
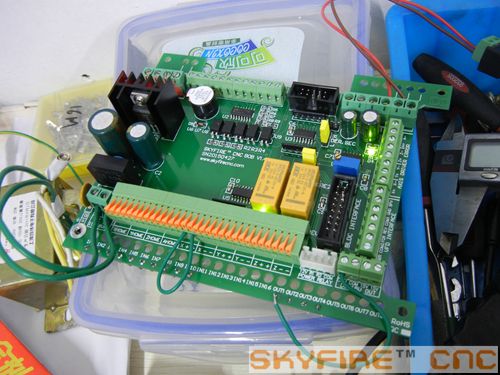
What's more, have been dealing with the controller part upgrade too to make electric parts easier for wiring and more reliable too
Will show more on this part when post electric works next.
 www.skyfirecnc.com
Email: [email protected]; Skype: skyfirecnc
-
05-13-2015, 09:23 PM #1803
Registered
- Join Date
- Mar 2014
- Posts
- 264
Re: Show how to build a CNC machine from the very beginning to the end
Nice clean and detailed post as usually Defeng
 ,
,
Ps: wainting your proforma
-
05-14-2015, 03:06 AM #1804
Member
- Join Date
- Sep 2005
- Posts
- 1195
Re: Show how to build a CNC machine from the very beginning to the end
Defeng,
Does this kind of PDB work on R8 spindle? Maybe you can also redesign and check for it. This PDB looks simple.
-
05-14-2015, 03:17 AM #1805
Registered
- Join Date
- Jul 2011
- Posts
- 441
Re: Show how to build a CNC machine from the very beginning to the end
Hi jips, Originally Posted by jips

Thank you I plan to make this electric PDB an optional device for all R8-QTC spindle, BT30 spindle and ISO20 spindle soon. So the final target of the electric PDB is the convenience for users who have no air resources.
And, I had sent it to you, please check:cheers:www.skyfirecnc.com
Email: [email protected]; Skype: skyfirecnc
-
05-14-2015, 04:34 AM #1806
Registered
- Join Date
- Jul 2011
- Posts
- 441
Re: Show how to build a CNC machine from the very beginning to the end
Hi asuratman, Originally Posted by asuratman
I do have this plan to use the PDB on R8 spindle too. My consideration is that the current one maybe a little weak for R8 spindles. Since it has been proved to work now, I will request a bigger force type for R8 spindles.www.skyfirecnc.com
Email: [email protected]; Skype: skyfirecnc
-
05-14-2015, 04:55 AM #1807
Member
- Join Date
- Sep 2006
- Posts
- 6463
Re: Show how to build a CNC machine from the very beginning to the end
Hi Defeng.........coming together very nicely and compact too.
Firstly a question.........changing belts for the 2 speed pulley change over......does this entail having two different belts for the pulley changes or is the same belt used for both pulleys with adjustment to the motor etc?
I ask because with the PDB on top and only a small slot to clear the belt, if it requires a second belt size then how difficult is it to remove the belt when the motor pulley is changed?
Second question.........I'm wary/dubious of the 3 screw fixing of the unit to the cartridge body at the bottom......I have had a similar system, many years ago, go bad when the screws elongated the dimples they seated in resulting, in that case, a motor falling off the machine.......not a pretty sight.....LOL.
Would it be more secure to have a split in the casing and a cross clamping bolt to clamp the casing to the spindle cartridge body?
I ask, because all the force from the PDB is axial and directly against the screws in the dimples.
Pressure on the screws for clamping is directed against the cartridge body and also backwards against the casing wall which will put a radial pressure against the casing wall where it is thinnest at the bottom, possibly causing it to expand away from the spindle body instead of clamping to it.
My preferred attachment would have been to have the lower casing of the PDB, below the belt slot, made with a bigger diam and split to have a cross bolt pinch screw method type of clamping.......just my preference.
If, in your opinion, the present mounting method is OK and secure......then so be it.
The 4 second actuation time is excellent......can't complain on that score, although some people will say "up the voltage a bit and halve the time"......LOL.....time is money........wamm ....bang.... it's out.
It's green for go with me on this package......just need a price...... whatever..... gotta have it anyway.
Ian.
-
05-14-2015, 06:05 AM #1808
Registered
- Join Date
- Jul 2011
- Posts
- 441
Re: Show how to build a CNC machine from the very beginning to the end
Hi Ian,
Firstly a question.........changing belts for the 2 speed pulley change over......does this entail having two different belts for the pulley changes or is the same belt used for both pulleys with adjustment to the motor etc?
-------it needs two different belts because we don't have much room to adjust the motor position or set a adjusting pulley on the head. So when changing the pulley and belts, you will need to remove the PDB device and change the belt through the square hole. It's a little complicated but there is no better way to do it and I think user won't do that often.. I guess you will love high speed and keep using the high speed ratio..LOL
Don't worry about the clamping rigidity of the cartridge. I have thought it over and make sure it works safe. We don't lock the cartridge with just dimples on ISO20 spindle body.. I drilled about 2-3mm depth into the spindle cartridge and use 12.9 class cylinder head jackscrews. You can imagine that would be very reliable lock pins there.
And Louie has mentioned a floating power drawbar in recent posts and I considered it also..but seems with a split head, it's hard to realize on SVM-0..what's more the room is very tight on top..
Up the voltage is a way to make the actuator run faster and have more strength but has to be limited in a reasonable range. And saving 1 second is not a subject in my opinion..
It's only a test setup of the PDB now.. I will make it formal at last..need some more time to do that before shipping..
www.skyfirecnc.com
Email: [email protected]; Skype: skyfirecnc
-
05-14-2015, 06:59 AM #1809
Member
- Join Date
- Sep 2006
- Posts
- 6463
Re: Show how to build a CNC machine from the very beginning to the end
Hi......I'm happy with that.....as you say probably won't need to do too many speed changes that often and the PDB body securing method appears to be satisfactory.
Only joking about upping the voltage etc.......some people might think it can be done, but reliability is more important and seconds don't really count in the end.
Sometimes you have to go with the flow.....there's nothing that says this is a perfect World we live in.....some awkward situations are only so when you project the worst case scenario, which in most cases never occurs.
Okey dokey.......we have a PDB that works, that's good news......Mother will be pleased....LOL.
Ian.
-
05-14-2015, 09:41 PM #1810
Registered
- Join Date
- Aug 2014
- Posts
- 889
Re: Show how to build a CNC machine from the very beginning to the end
Ok handle, now break the piggy bank open and place an order already.
-
05-15-2015, 04:25 AM #1811
Member
- Join Date
- Sep 2006
- Posts
- 6463
Re: Show how to build a CNC machine from the very beginning to the end
Way ahead of you man.........already committed to buy whatever the price.....it has to be competitive or it won't get off the ground.......no doubt the revamp is well in hand and will be announced when D is ready.
To date no one has voiced a criticism against the all electric PDB re-design, so we can assume it meets with unilateral approval, and the air solution is probably in the same boat as it will be as per current designs, nothing changes etc.
So, apart from a flashing red light or one of those beepers like they have on fork lifts to indicate reversing that would drive you crazy when it blew off each time and stuck on the top of the casing to indicate the cycle end or malfunction, I don't think anything else needs to be added to the current package.
Ian.
-
05-17-2015, 12:14 PM #1812
Registered
- Join Date
- May 2015
- Posts
- 11
Re: Show how to build a CNC machine from the very beginning to the end
Hello All,
For almost 3 years I have been looking for a small CNC mill. This is the only machine that meets my requirements that I have found, so I will be ordering the SVM-2P.
Will post details when I have it.
cheers
-
05-17-2015, 01:16 PM #1813
Registered
- Join Date
- Mar 2014
- Posts
- 264
Re: Show how to build a CNC machine from the very beginning to the end
Great , I hope the skyfire community will grown quick Originally Posted by maelstrom007
-
05-20-2015, 02:59 AM #1814
Registered
- Join Date
- Jul 2004
- Posts
- 108
Re: Show how to build a CNC machine from the very beginning to the end
Yeah Jips, I am sure it will as these machines looks the works, going by the work Skyfire is putting in.
I am awaiting final pricing for my custom SMV-2 enquiry, and will place the order soon after.
Fun times awaiting!
Cheers,
Beano
-
05-26-2015, 08:32 PM #1815
Registered
- Join Date
- Mar 2014
- Posts
- 264
Re: Show how to build a CNC machine from the very beginning to the end
So Mr Louie , did the precious arrived well ? Originally Posted by louieatienza
-
05-26-2015, 11:17 PM #1816
Gold Member
- Join Date
- Apr 2009
- Posts
- 5516
Re: Show how to build a CNC machine from the very beginning to the end
ETA early June.... Originally Posted by jips
BTW for anyone interested, it cost me $125 for customs broker to file the necessary paperwork... Not too bad.
-
06-03-2015, 03:40 AM #1817
Registered
- Join Date
- Aug 2014
- Posts
- 889
Re: Show how to build a CNC machine from the very beginning to the end
It's early June. Where's the messiah?
lol
if you can, when you get the mill all setup, post a pic of it with a real person standing next to it, so I can get a feel of the size of it.
Tks.
-
06-03-2015, 09:09 AM #1818
Registered
- Join Date
- Oct 2010
- Posts
- 1189
Re: Show how to build a CNC machine from the very beginning to the end
i so far did not even receive the spindle i payed and ordered an this is an trading product ,.. so i am really yealous seeing the first one to get anything ,..
-
06-03-2015, 01:17 PM #1819
Registered
- Join Date
- Aug 2014
- Posts
- 889
Re: Show how to build a CNC machine from the very beginning to the end
It's all good Tkamsker, I'm sure you'll get it.
He prolly just has too much to do right now, I mean having to custom build handlewanker's machine would be quite a challenge for even a well established manufacturer.
I'm so skeptical of all this.
16 months to receive a mill? Please send me money and I too, will build one for you, complete in half the time.
Can't wait for this sham to end.
-
06-03-2015, 03:03 PM #1820
Gold Member
- Join Date
- Apr 2009
- Posts
- 5516
Re: Show how to build a CNC machine from the very beginning to the end
It's not a sham I'm sure... People have given more money away with far less proof of work. Here we know work has been done, and custom requests with pics as proof. Originally Posted by G59
I forgot the actual ETA of port arrival, sure my customs broker will let me know when it does arrive.... Any day now...


Similar Threads
-
Show us your machine stands
By OHLEMANNR in forum Benchtop MachinesReplies: 7Last Post: 05-05-2013, 03:19 AM -
a machine design (pics) from beginning to end
By blurrycustoms in forum Vertical Mill, Lathe Project LogReplies: 42Last Post: 04-25-2013, 02:36 AM -
dry build or glue from the beginning?
By Ezra in forum Joes CNC Model 2006Replies: 2Last Post: 10-29-2010, 04:44 AM -
Newcastle: Beginning of build plan
By pippin88 in forum Australia, New Zealand Club HouseReplies: 7Last Post: 09-16-2010, 10:22 AM -
Beginning to build my Z-axis.
By zonk2 in forum DIY CNC Router Table MachinesReplies: 0Last Post: 12-23-2008, 06:17 AM
