


After a few months of little to no progress, I'm finally (and rapidly) approaching the point where I'll be putting some moving parts together. Nearly all my metal parts, with the exception of the X axis angles and rails, have been finished for a long time. My stumbling block was making the base. I am really good at a lot of mechanical tasks, but for some reason making square cuts in wood is something I've never had really good luck with.I don't really know anyone with a good set of woodworking tools, and my own table saw is a 30-year-old Rockwell that's never been *quite* right.
Long story short, I spent some time adjusting the table saw as right as I could get it and just started cutting. I figured worst case, I'm out a little plywood and have to regroup and rethink. My first few cuts were all the large square parts such as the skins and whatnot. I cut everything just a little large to account for any errors in the saw (or in my technique) and after just a few cuts managed to get the saw pretty well squared up. From there it was just a matter of cutting everything to the best of my meager ability and hoping for the best.
There are a few places where the edges of the wood don't meet exactly flush, and a few gaps in some non-critical places, but three things ended up as near perfect as I could have hoped: the torsion box is flat, the side walls are level, and the tops of the walls are parallel from front to back. I can adjust out any other minor flaws from here.
I never, ever take in-progress photos of anything because I'm lazy, but here's what I've got so far:
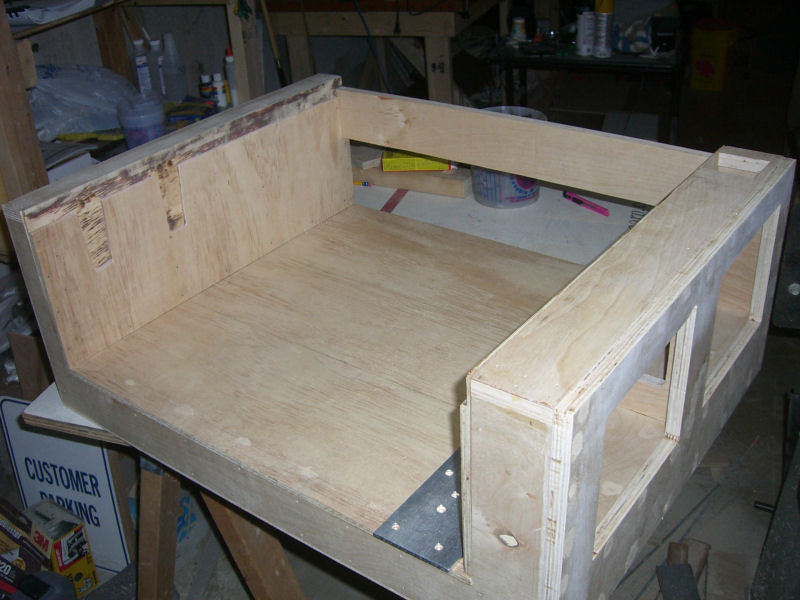
The base, nearly complete, just sitting on my temp work table while I sand and fill some stuff. My real work bench is just barely in sight at the top of this pic, but it's made from a 2" thick hardwood door that's been planed flat. Assembly would have been much harder without that nice reference surface to work on. You'll see that I opted against all the complex rabbeting on the inner skin and just cut the whole length and the pockets to the same depth. I also made those left pockets too tall, but that's minor.The right inner skin is cut the same way (but the pockets are correct).
A view of the right outer skin and electronics bay. This piece of ply ended up having a pretty serious bow to it, so I smacked it on with about a half pound of drywall screws.
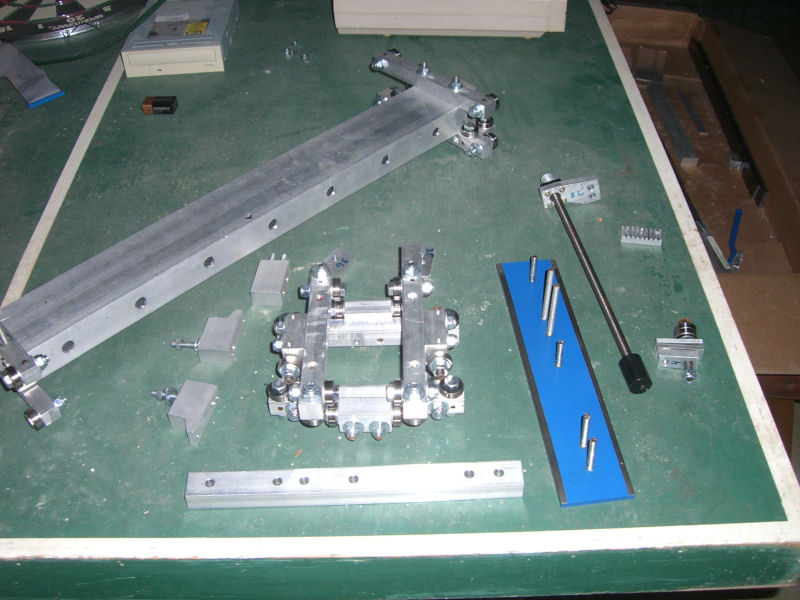
The bulk of the metal parts. Some of the other stuff is over on the big bench, and as I said before, the X rails still need to be made. I'll do those on the NC mill at work because I hate working steel with my crappy home tools, and my boss is teaching me some machining basics with our new mill and lathe. Any excuse to get my hands on that equipment again!
So, things are MUCH further along than they were just three short weeks ago. Still a lot of work to do...but hopefully it won't be long before I'm swearing loudly at the final machine adjustment process. Huge, huge thanks go out to everyone who's posted their build here already. I've learned a lot from other peoples' successes (and mistakes
Thread: Finally, some progress to share!
Results 1 to 3 of 3
-
11-19-2011, 07:04 PM #1
 Registered
- Join Date
- Jan 2010
- Posts
- 0
Finally, some progress to share!
-
11-20-2011, 03:58 PM #2
Registered
- Join Date
- Jul 2011
- Posts
- 103
Nice work. Yeah, mine has a bit of putty in it too. All covered up with paint, no one can tell the difference.
-
12-03-2011, 07:04 PM #3
Registered
- Join Date
- Jan 2010
- Posts
- 0
I dub thee: Very, Very Red.


 Reply With Quote
Similar Threads
-
Just had to share....
By fourwheeler in forum NovakonReplies: 13Last Post: 09-04-2010, 12:23 PM -
Bump Share with me
By SPEEDRE in forum SolidworksReplies: 2Last Post: 06-21-2010, 07:12 PM -
Share with me?
By SPEEDRE in forum SolidworksReplies: 2Last Post: 05-20-2010, 06:59 PM -
some things to share
By IgorWojas in forum I.C. EnginesReplies: 0Last Post: 07-10-2007, 07:16 PM -
ok share the knowledge share the wealth...huh...right
By oaktree444 in forum MetalWork DiscussionReplies: 9Last Post: 10-18-2005, 10:54 PM
