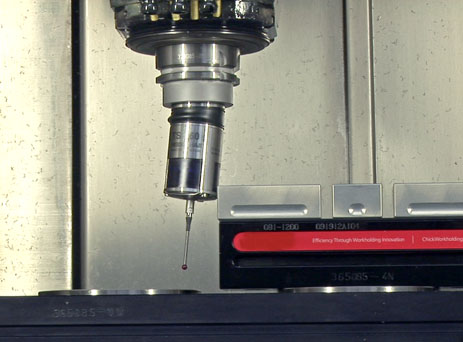
Together with the control, workpiece touch probes from HEIDENHAIN precisely capture the position and orientation of workpieces. This information makes it easy to align the workpiece to be machined, and to set datums on it. Tool touch probes from HEIDENHAIN help to identify wear or tool edge breakage in good time via the precise measurement of tool dimensions and with cyclic wear control. Since the touch probes are designed with the shop floor in mind, machine operators particularly benefit from them in terms of production quality and efficiency.
HEIDENHAIN TS 460 touch probes for measuring workpieces and TT 460 touch probes for measuring tools on tool machines provide several fundamental developments in this regard, including a wear-free optical sensor, a blowing device for cleaning the measuring position, and integral energy generation. Nothing is left to chance with data transmission on the TS 460 and TT 460 touch probes either—both can use infrared and radio technology. Infrared provides maximum precision levels and rapid signal transition, whereas radio technology has a wide range and can be used on large-scale, non-enclosed machines.
Effective collision protection
One very important development is the collision protection for the TS 460 touch probe from HEIDENHAIN. The mechanical collision protection is installed between the touch probe and taper shank, and can compensate for slight collisions as well as prevent larger collisions. It makes use of what is already in place and available: The electronics of the touch probe and the readiness signal from the touch probe informing the control that it is activated.
Machine operators now rarely need to fear damages from a touch probe colliding with a workpiece or clamping fixture. In the event of a light collision, the mechanical collision protection can absorb the shock, and the touch probe yields. Once the deflection reaches 1 mm, an integrated switch is actuated that then deactivates the readiness signal. This is the information that triggers the control to immediately stop the machine. Since the touch probe traverses a certain response path from activation of the switch until the machine stops, the collision protection permits a further 5 mm of deflection through which the touch probe is able to yield without any damage being caused.
The collision protection incidentally also acts as a thermal decoupler, preventing the dissipation of heat from the spindle to the touch probe. Such flows of heat may occur particularly during longer measuring cycles if the spindle still has a high temperature from previous machining. The result would then be erroneous measurements.


 Germany