


Quick update,
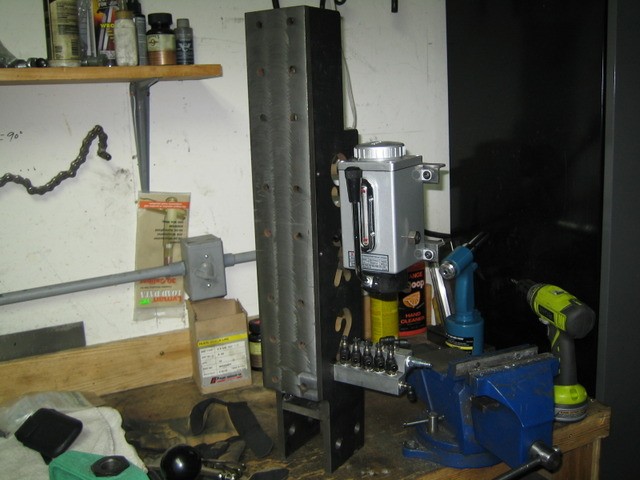
Few major assemblies. Below is the column brace. I am using a 2" spacer under the column if that rings a bell. Opted to make a column brace. Turns out the deflection is 20x less with 2" spacer when using the 1/2" brace than the mill is as it comes from the factory with no spacer or brace. Deflection is measures at .001 now with the Z axis and having 2" more travel. Twist it not noticeable/measurable by me at least. It uses sixteen 3/8"-24 bolts to bolt it to the column. I surfaced the face that sits against the column with a 2.5" face mill on a Bridgeport. The mount foot not shown offers rotational as well as forward/back and side to side angle play. Bolting it without moving the column is the trick but I think I know how I can do it. Just takes several iterations and lots of time and measuring. We'll see.
You can see I have the one shot oilier and manifolds for the oil and air hanging off that as well. The mill will be oiled both X and Y axis as well as the X and Y ball screws. Will be manual oiling.
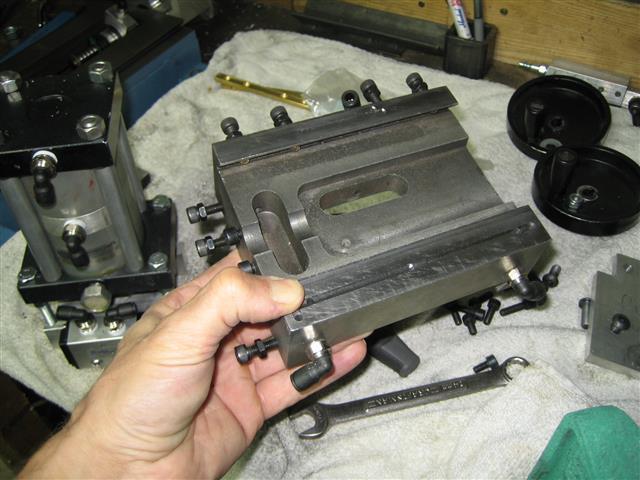
Mock up of the pneumatic draw bar, it compresses 6 bellvile washers at 75psi. Once all set up I'll have the parts re-cut with a water jet.
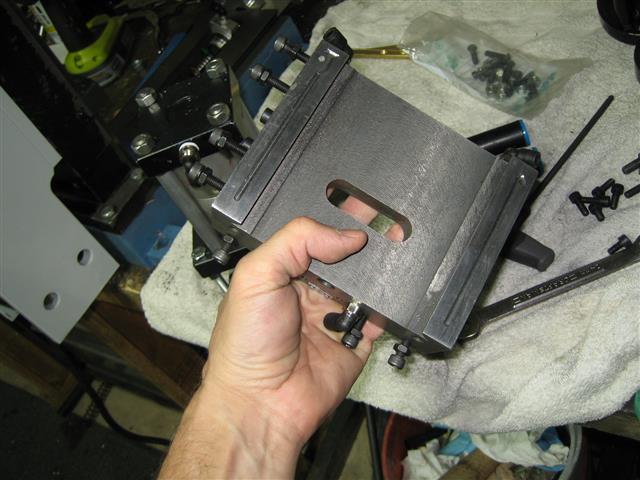
Using Leaded brass gibs that are countersunk and gib screws are now hex head bolts with lots of contact can see them in the pic. The gib profile is now more like the old Emco gib profile. You can see the new hex head gib adjusters as well as one of the fittings for the saddle. There are more on the rear side as well. Took lots of thought, not much room for oiling and under the saddle was even tighter. I worked it out though. Got the cncfusion kit in a drawer and made an additional 1/4" spacer plate for the Y axis as to go with it.
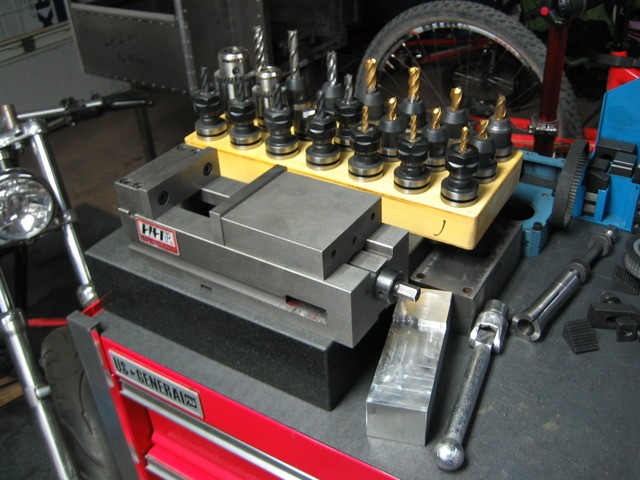
Some of the tooling, got a drawer full as well as the 2" steel column spacer block and granite surface plate. No Chinese end mills, all of the end mills are OSG, Niagara, Weldon, Kennametal or what not. About 50% are carbide, got a drawer full of all kinds of spares and sizes ranging from 1/8" to 3/4".
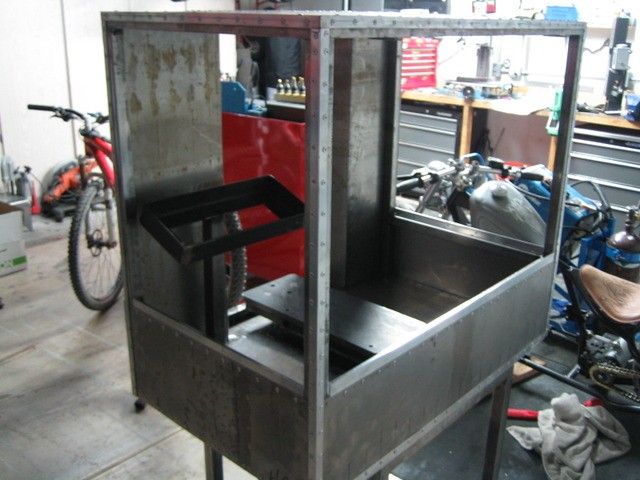
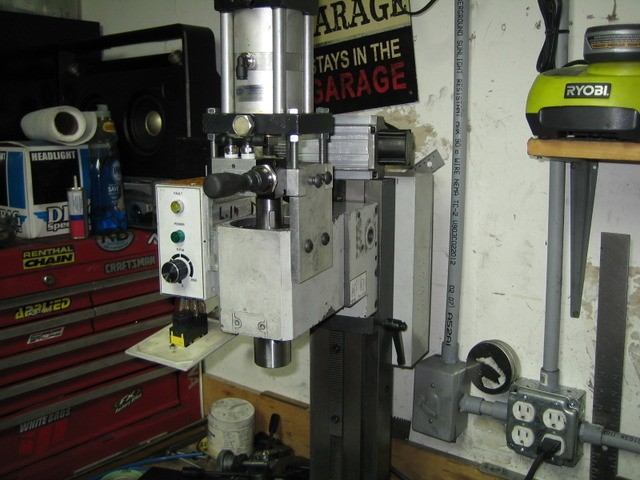
CNC enclosure so far, getting close to powder coating it. That's a 3/4" steel plate the mill base bolts to in the enclosure. Got a small 700 lumen LED light for inside the cabinet that I'll be mounting as well and I'll be welding in rails for the computing power hanging under the enclosure. After all that I will set up the mill in the enclosure and assemble it with the CNC fusion stuff and spend lots of time squaring the mill. I already squared the head to the the column with shims between the 2 spindle housing parts using 3/4 drill rod.
Thread: LMS SX2 Build progress
Results 1 to 15 of 15
-
04-14-2014, 06:25 AM #1
 Registered
- Join Date
- Mar 2011
- Posts
- 123
LMS SX2 Build progress
-
04-15-2014, 03:02 PM #2
Registered
- Join Date
- Feb 2011
- Posts
- 212
Re: LMS SX2 Build progress
looking forward to seeing how this turns out
-
04-15-2014, 04:06 PM #3
Registered
- Join Date
- Oct 2010
- Posts
- 1189
Re: LMS SX2 Build progress
I designed this weekend a Cover for my Mill ... like a small Bridgeport
 -
-
Gesendet von meinem SM-N9005 mit Tapatalk
-
04-15-2014, 06:40 PM #4
Registered
- Join Date
- Mar 2011
- Posts
- 123
Re: LMS SX2 Build progress
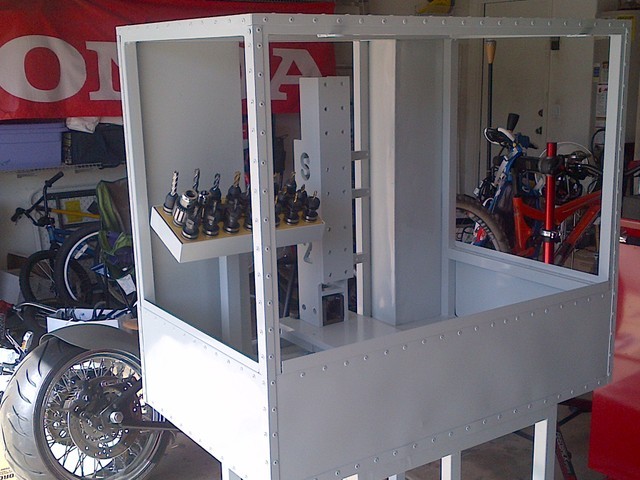
added rails to mount black boxes under hte cabinet for electrinics, enclosure and back bracce is at powdercoater currently getting a light grey/cream gloss finish to reflect light and allow good contrast with the mill. 2 weeks.
-
04-15-2014, 10:55 PM #5
Registered
- Join Date
- Apr 2003
- Posts
- 540
Re: LMS SX2 Build progress
Great looking cabinet/enclosure. I'm looking forward to seeing how this turns out. Thanks for the posts.
-
04-21-2014, 05:31 AM #6
Registered
- Join Date
- Mar 2011
- Posts
- 123
Re: LMS SX2 Build progress
Ordered gecko based setup today. Hopefully it all lands along with the powder coated cabinet next week. Then I need to water jet the plexi glass and move forward.
-
05-02-2014, 03:21 AM #7
Registered
- Join Date
- Mar 2011
- Posts
- 123
Re: LMS SX2 Build progress
Enclosure so far...
-
05-05-2014, 02:08 AM #8
Registered
- Join Date
- Feb 2011
- Posts
- 212
Re: LMS SX2 Build progress
Nice work. I see you have a cycle as well
-
05-05-2014, 05:37 AM #9
Registered
- Join Date
- Mar 2011
- Posts
- 123
Re: LMS SX2 Build progress
Ahhh yes that is right, you can see that build here -> My SX650 Scratch Bobber build - XS650 Forum
-
05-05-2014, 10:08 AM #10
Registered
- Join Date
- Feb 2011
- Posts
- 212
Re: LMS SX2 Build progress
Very impressive nice work . I take it your a welder by trade ?
I like how you went with a ridged and added the shock under the seat . Also what size venom is that ?
anyways back on topic
-
05-05-2014, 07:42 PM #11
Registered
- Join Date
- Jun 2013
- Posts
- 75
Re: LMS SX2 Build progress
Got any more pics or info on the oiler system? Want to do this too soon. Nice. Build
Sent from my XT907 using Tapatalk
-
05-10-2014, 11:28 PM #12
Registered
- Join Date
- Mar 2011
- Posts
- 123
Re: LMS SX2 Build progress
Not a welder no, I am an IT director at fortune 500 financial services company.
That is a 230 Venom rear. Not too bit, not too small.
Shock is a Fox air/Hydraulic RP2 shock with adjustable compression and rebound.
Pics of the oilier system will be coming yes. Still waiting or my electronics parts to start final assembly. Never seen an oilier done on an X2.
-
05-11-2014, 03:25 AM #13
Gold Member
- Join Date
- Feb 2010
- Posts
- 3447
Re: LMS SX2 Build progress
Enclosure looks awesome!
Washington state
-
05-12-2014, 05:05 AM #14
Registered
- Join Date
- Mar 2011
- Posts
- 123
Re: LMS SX2 Build progress
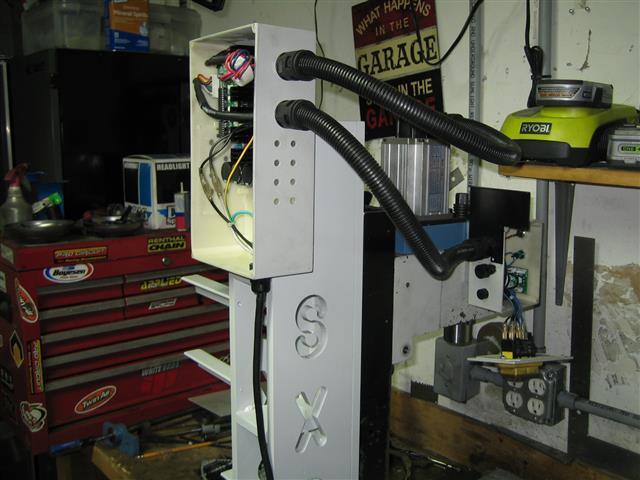
The electronics will be relocated to the back of the support column, got it mounted grounded and it tested fine.
Added few pics of the oil passages that were asked about, basically the saddle, not much to see, drill holes, mill passageway, about it really. Not sure why it is not done more. I'll be running 20wt motor oil.
-
05-13-2014, 04:19 PM #15
Registered
- Join Date
- Feb 2011
- Posts
- 212
Re: LMS SX2 Build progress
gotcha . both are nice builds


 Reply With Quote
Similar Threads
-
CNC Build progress Seiber Hegner RB1
By native34 in forum Bridgeport / Hardinge MillsReplies: 4Last Post: 01-01-2015, 05:58 PM -
SBR20/MDF build progress
By frige in forum DIY CNC Router Table MachinesReplies: 0Last Post: 07-05-2011, 10:15 PM -
Build Guide/ Progress
By bigdrock44 in forum Joes CNC Model 2006Replies: 1Last Post: 04-12-2011, 01:10 AM -
My first build in progress...
By ESP Graphics in forum DIY CNC Router Table MachinesReplies: 0Last Post: 01-04-2010, 11:46 PM -
UK newbie first build in progress
By m2uk in forum DIY CNC Router Table MachinesReplies: 7Last Post: 01-19-2009, 05:49 PM
